PART I - IN THE BEGINNING...
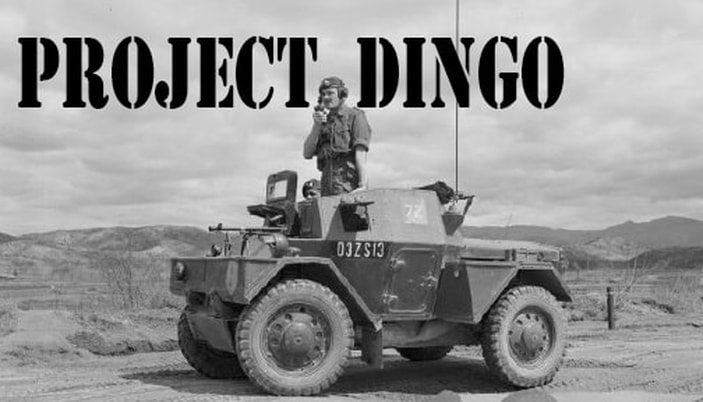
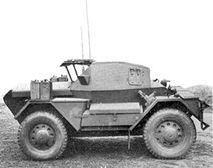
I have been fascinated by the little British WWII scout car for a very long time. It's interesting lines and the fact that it doesn't take up a lot of space (even the real thing) make it a really desirable project to model in 1:6th scale. I don't really have a ton of British figures and the chances of getting any more are slim to none, but the fact that you don't need a huge crew to man the Dingo also works out well for me. I think all of us were hoping that we were going to have Dragon Sherman Fireflys in our collection and I even invested in the British tankers to man it. At that time I was seriously looking at this project as a companion piece. When the tank didn't happen, I shelved the idea. Recently, Gray Ghost started lobbying me to team up with him and make a couple of them. At the last meeting, SSCC club member, Amaral, said that he would be interested in being in on the project as well, and I started thinking about it once again. The current thought is that we will build three of them, all part of the same recon unit and Amaral is researching that side of the project.
I have been fascinated by the little British WWII scout car for a very long time. It's interesting lines and the fact that it doesn't take up a lot of space (even the real thing) make it a really desirable project to model in 1:6th scale. I don't really have a ton of British figures and the chances of getting any more are slim to none, but the fact that you don't need a huge crew to man the Dingo also works out well for me. I think all of us were hoping that we were going to have Dragon Sherman Fireflys in our collection and I even invested in the British tankers to man it. At that time I was seriously looking at this project as a companion piece. When the tank didn't happen, I shelved the idea. Recently, Gray Ghost started lobbying me to team up with him and make a couple of them. At the last meeting, SSCC club member, Amaral, said that he would be interested in being in on the project as well, and I started thinking about it once again. The current thought is that we will build three of them, all part of the same recon unit and Amaral is researching that side of the project.
|
|
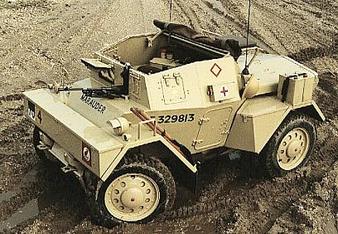
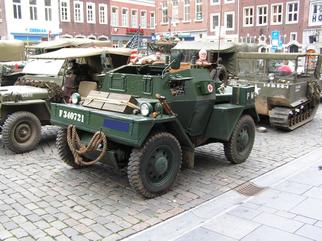
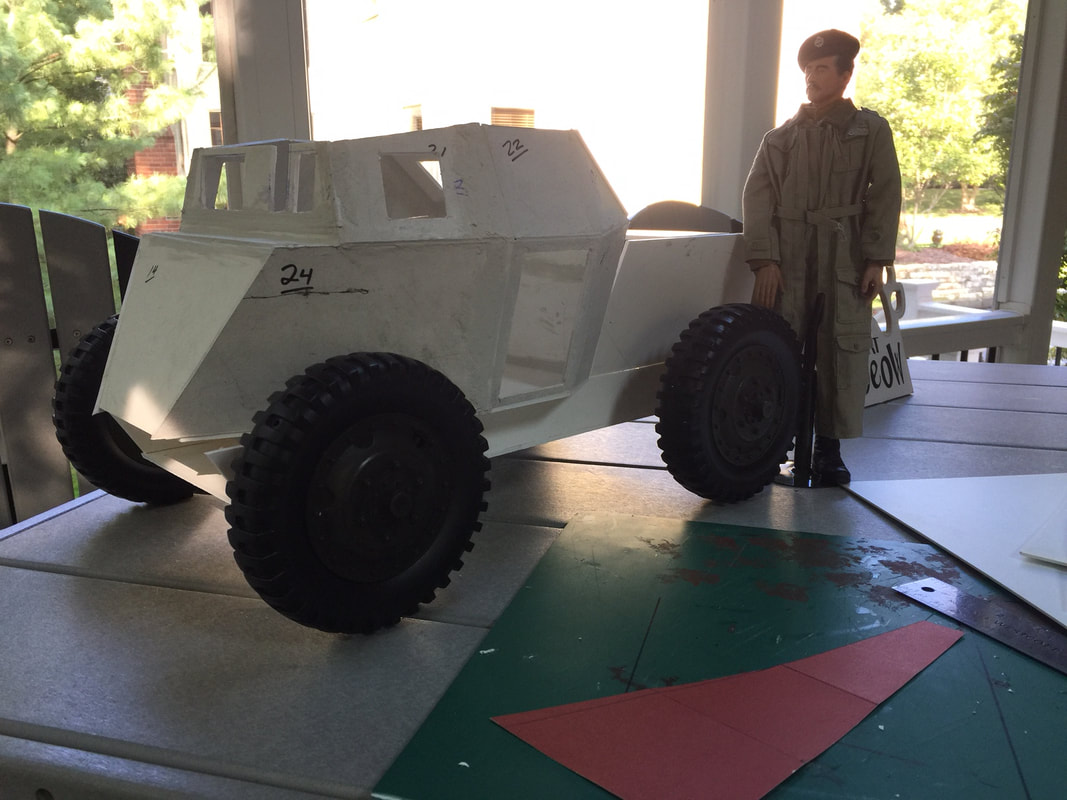
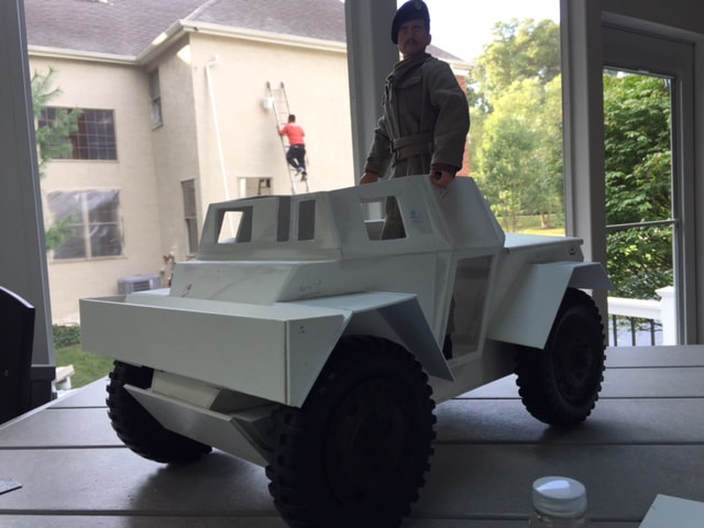
I think the main thing that I like about the Dingo is that it doesn't take up much more space than a Jeep. It has interesting lines and the open crew compartment gives you lots of opportunity to add all kinds of personal crew detail items. And you also get to model an interesting crew; black berets with cap badges and interesting insignia. Yup, my type of project.
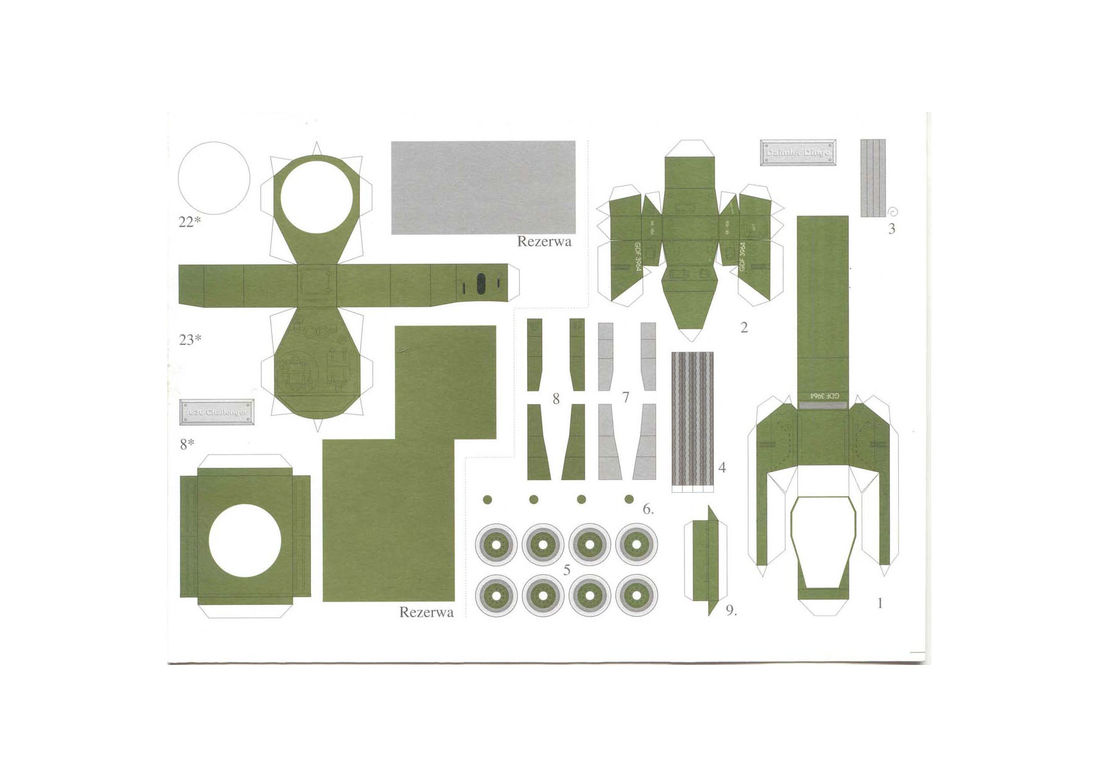
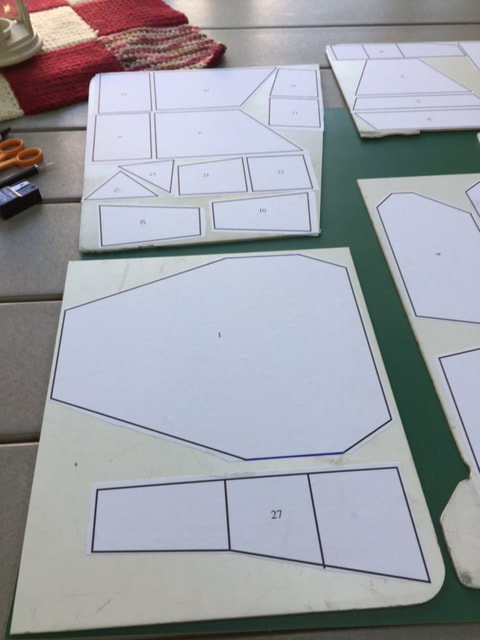
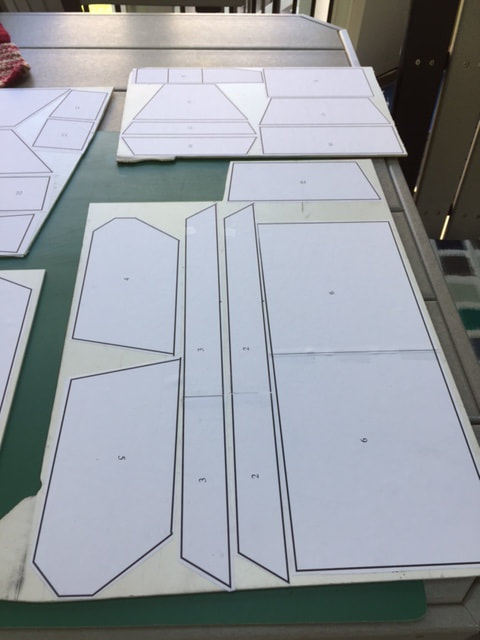
So.... about five years ago...when I first started looking at this, I found some plans online. Below are the plans that I decided on. You can see from my picture that I numbered each of the pieces on the plan so that I would be able to identify the actually pieces later on.
So.... about five years ago...when I first started looking at this, I found some plans online. Below are the plans that I decided on. You can see from my picture that I numbered each of the pieces on the plan so that I would be able to identify the actually pieces later on.
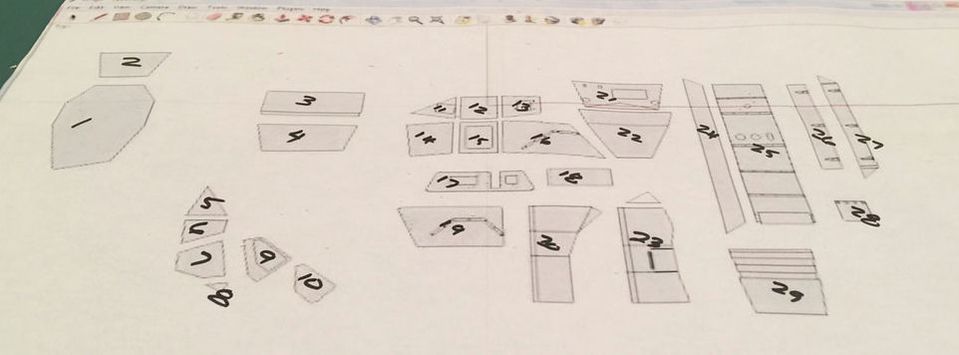
Below you can see my cut out pieces of 1/8" styrene enlarged to 1:6th scale. And here is where the project began to fall apart. As I tried to put it together I realized that somewhere along the line, things were not fitting together as they should. I really don't know what the problem was, but as I started to put pieces together, I realized that I had wasted a lot of time and styrene. Probably something that I did wrong, but I wasn't getting anywhere and realized that I would need to start over again.
|
|
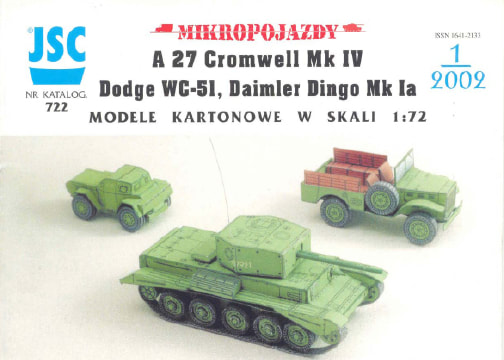
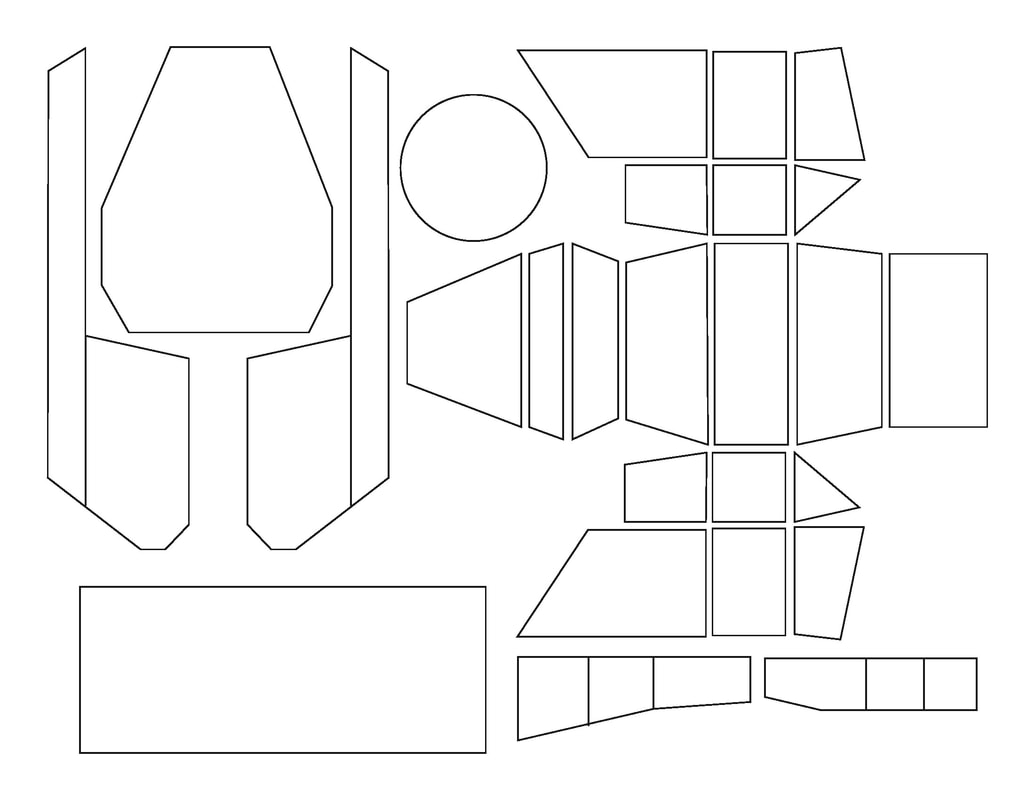
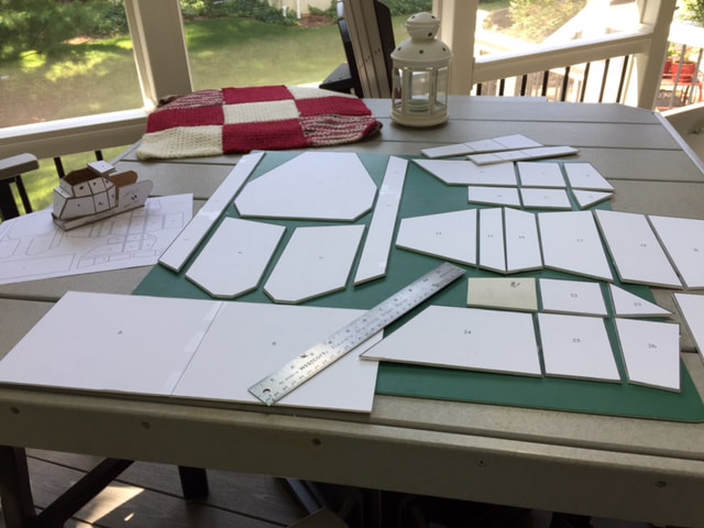
It is possible that I will be able to salvage a lot of the styrene. I found a paper model online that contained 1/72 scale paper models of a Cromwell, a Dodge Weapons Carrier and a Daimler Dingo and I was pretty sure I could make this work for me.
|
|
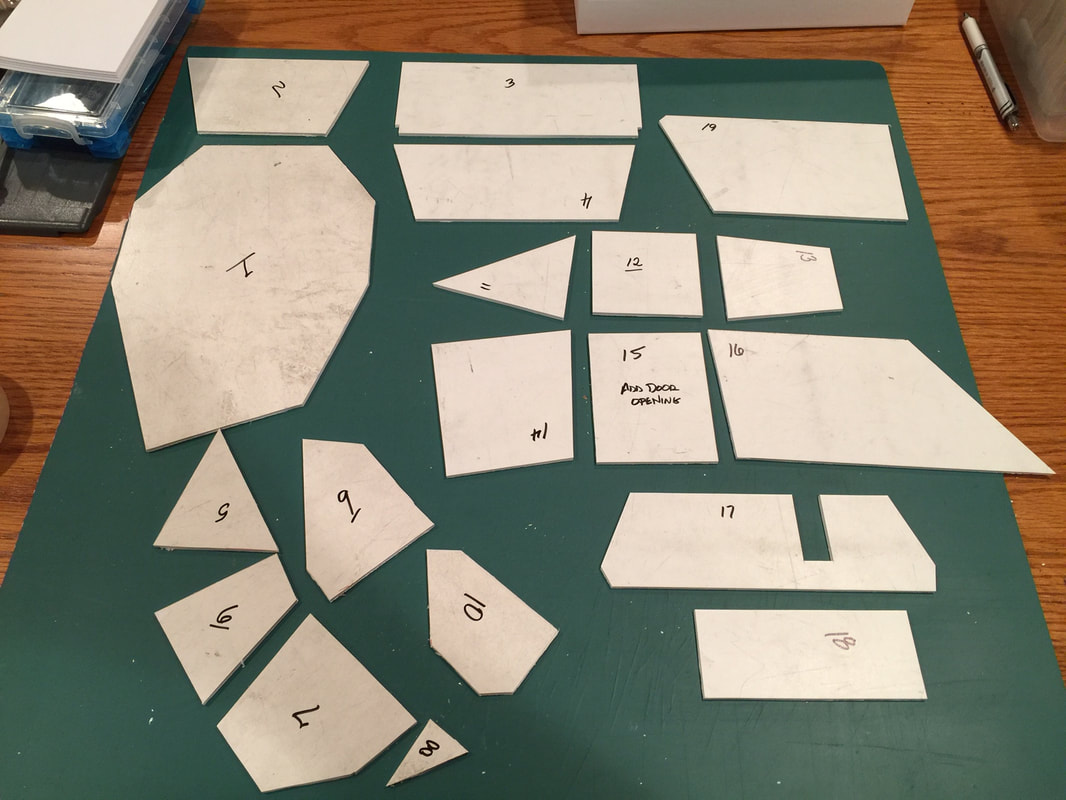
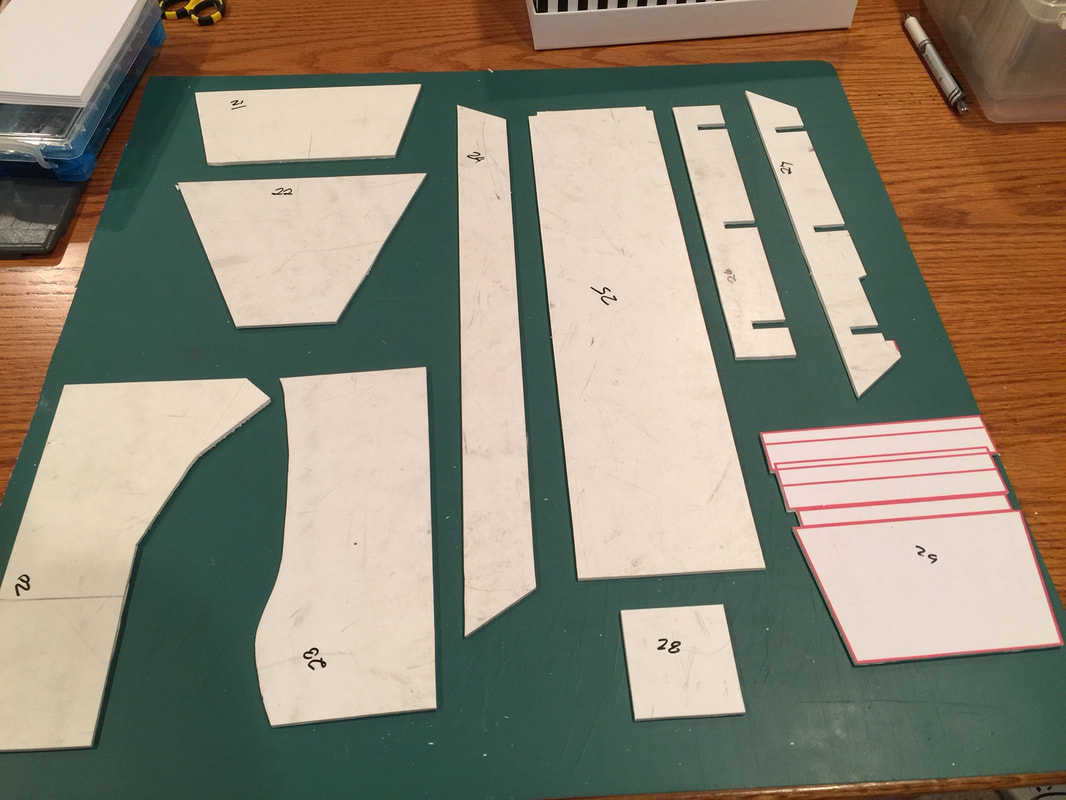
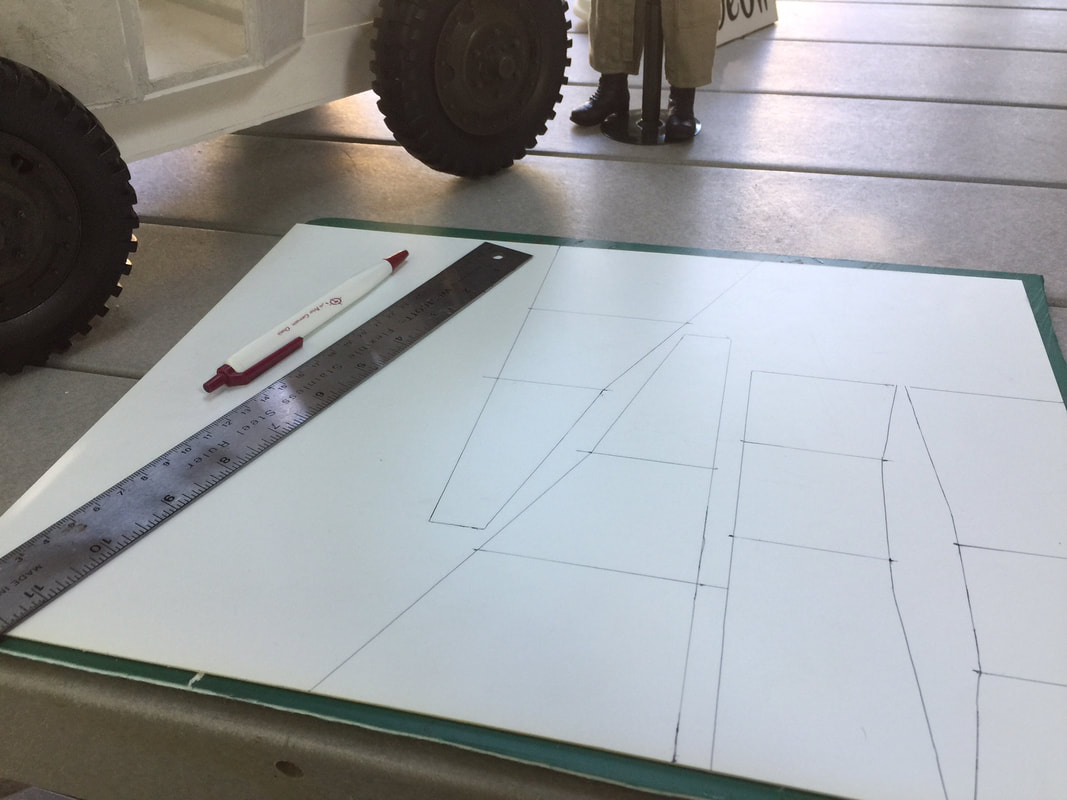
The above plan on right gave me everything I needed to create a scale set of templates for making the basic body of my Dingo. I already had an isometric drawing of the vehicle in 1/6th scale, so I included a wheel circle from the paper model to help me size to the correct 1:6th dimensions. (Builder Note - the plan below needs to be tweaked to work correctly, do not try scaling this plan up, you will be frustrated).
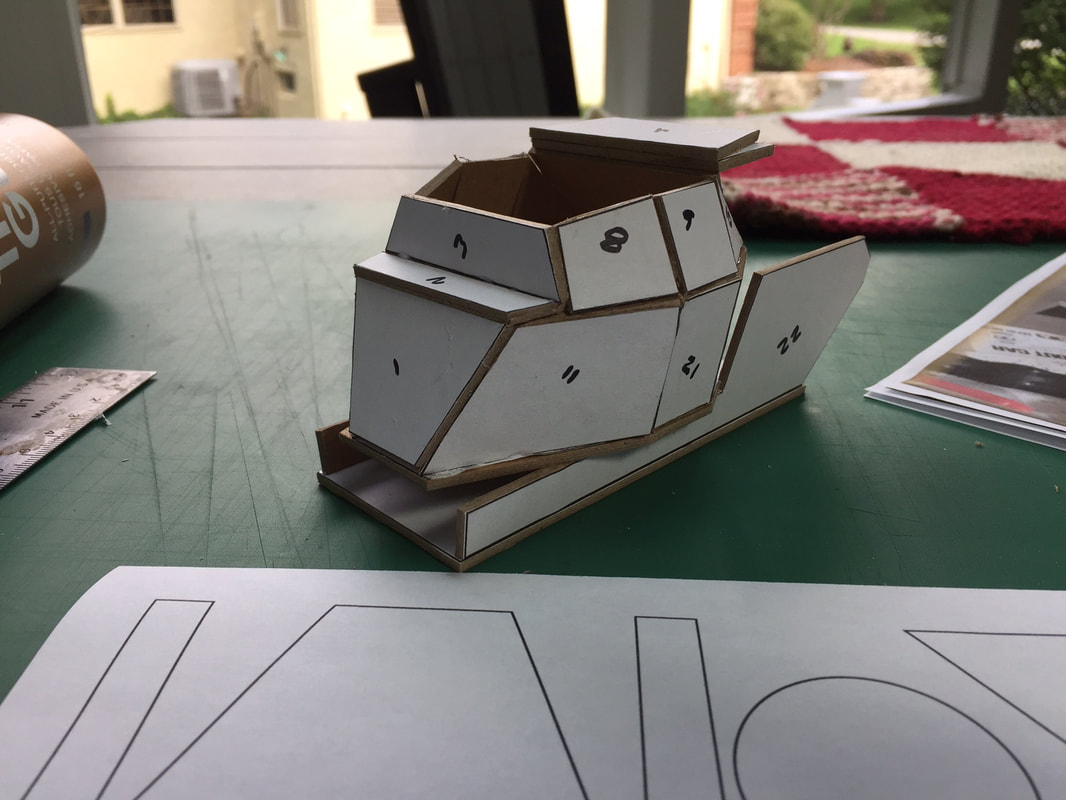
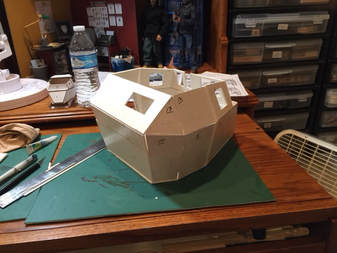
I decided though that I was not going to make the same mistake twice, so I would first print out the plan in a smaller scale and build a test vehicle out of cardboard. Below is my test piece. It is roughly near 1/35th scale (I'm eyeballing it there). Building the test piece was helpful because it quickly showed me where I would have challenges with the real build.
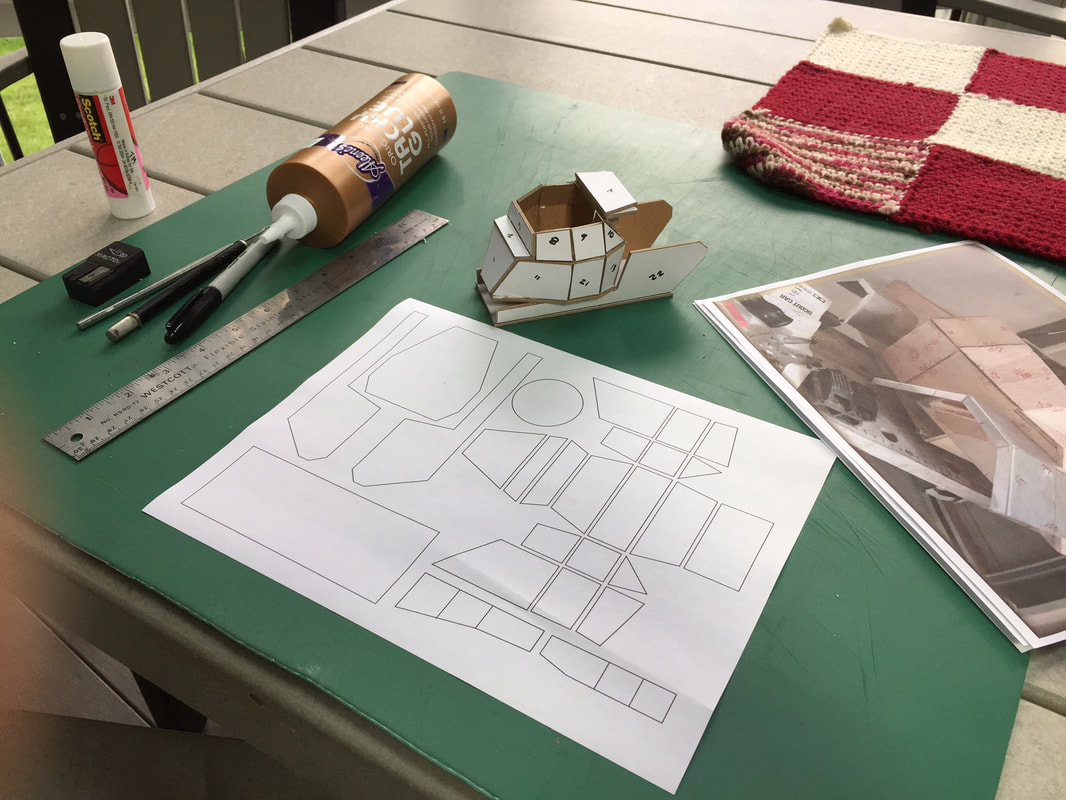
The closeup illustrates that the cardboard was a little too thick for this smaller scale. That should not be an issue in 1:6th scale. But the test vehicle also showed me some areas in the build that I will need to tweak as I work with the scale model. Some of that I was able to adjust in the templates, some will have to be done on the fly, but I do believe that I now have a working template that will get me to the basic build.
NEXT STEPS - Up next will be printing the new templates out in 1:6th scale and then cutting out the actual styrene pieces to begin building the basic shell of the vehicle. There are quite a few pieces not included in the templates that I will need to create as I go along. As I do that, I will need to create additional templates for those pieces for Gray Ghost and Amaral. Once I have corrected the templates, they will be available to anyone who wants them in pdf form.
Stay Tuned for the next episode in the DINGO PROJECT
PART II - 8/11/17
UPDATE - Finally had some time to work on the Dingo a little bit, so on Wednesday, I printed out the templates and cut some styrene...
Stay Tuned for the next episode in the DINGO PROJECT
PART II - 8/11/17
UPDATE - Finally had some time to work on the Dingo a little bit, so on Wednesday, I printed out the templates and cut some styrene...
|
|
I use a glue stick to glue the paper templates onto my styrene sheet. The glue is not terribly tacky and it makes it fairly easy to get the paper off later.
|
|
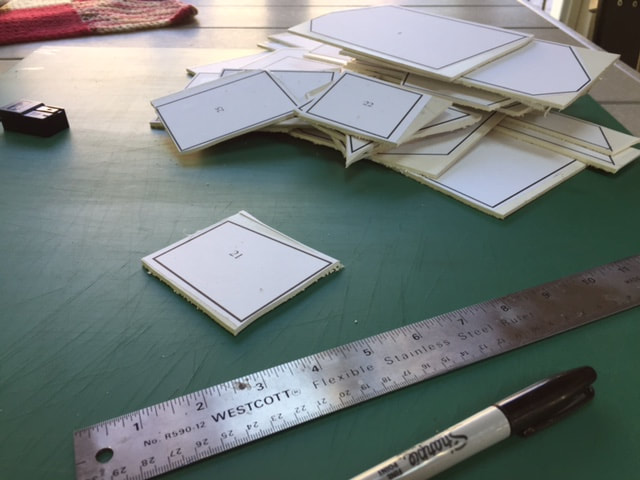
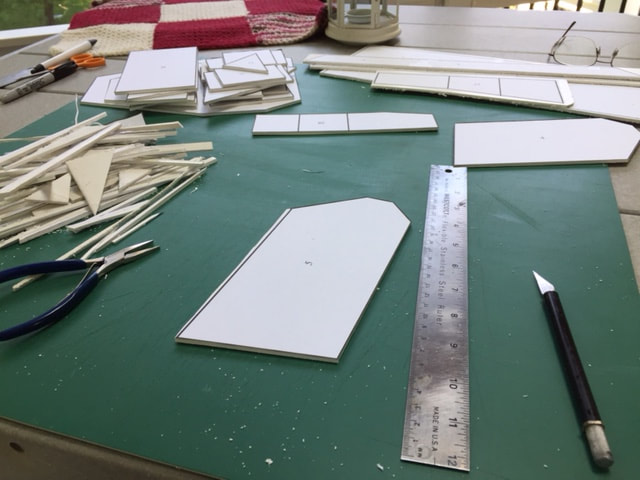
I have a scroll saw, so I used it to cut all the pieces out of the large sheet, making it easier to trim them to size with an Xacto and straight edge. On the left is my untrimmed pieces and one the right...well, that is about three and a half hours later. Below, all the pieces set out after I finished cutting. My hands were killing me.
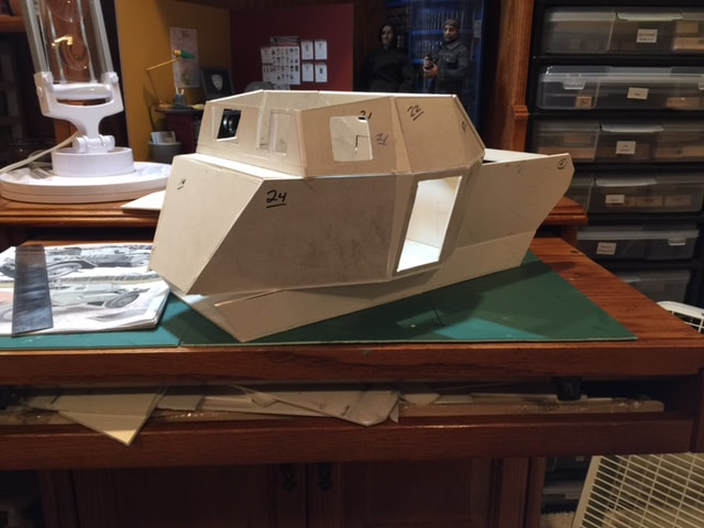
As mentioned in the first installment of this project, the plans that I came up with were drawn on the computer from a cardstock model that I found online. I found as I started assembly that everything didn't fit as expected. As I began the process of assembling the model, I found that I was having to use scrap styrene to fill some rather unfortunate gaps. Below is the front half of the crew compartment and if you look closely, you can see some of the problems that I have had to "adjust" for. I will be doing a lot of puttying and sanding to clean up this particular dingo.
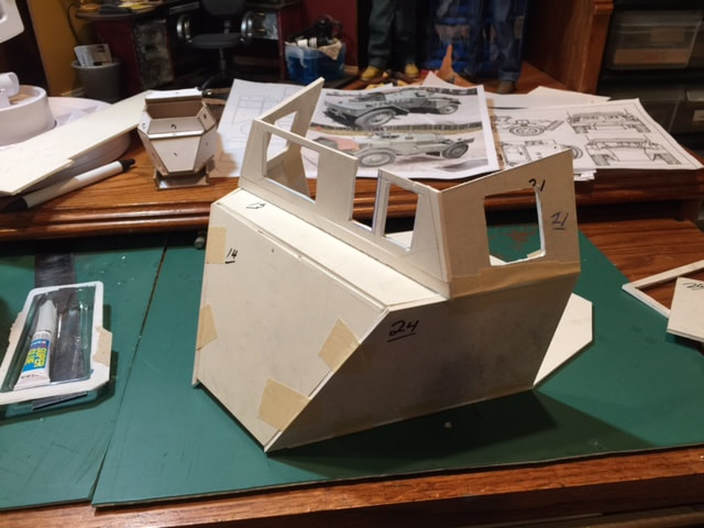
The good news is that I will be able to go in and tweak my templates before Gray Ghost and Amaral attempt to build one of these babies. On the left below is the other side of the front of the crew compartment. Below right is the completed crew compartment. If you look carefully, you can see where I had to add styrene to the pieces to fill large gaps. Once it is puttied and sanded, those mistakes will no longer be evident (in theory).
|
|
|
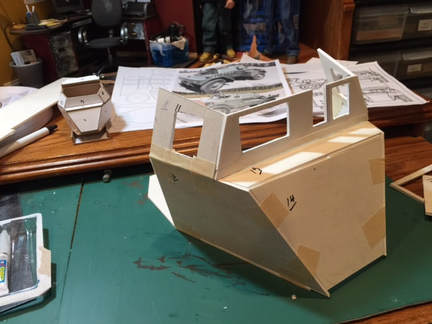
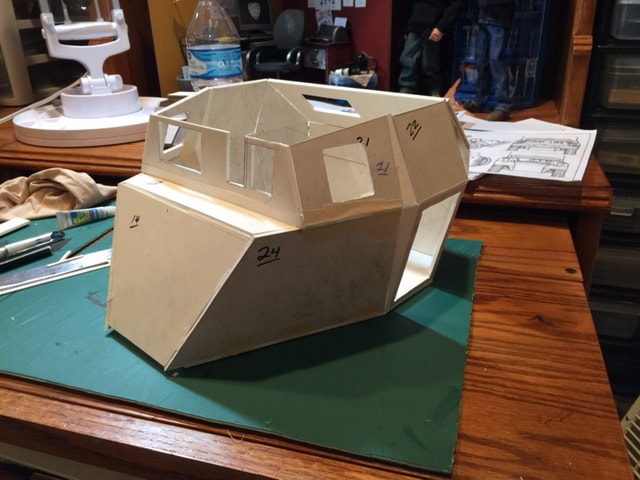
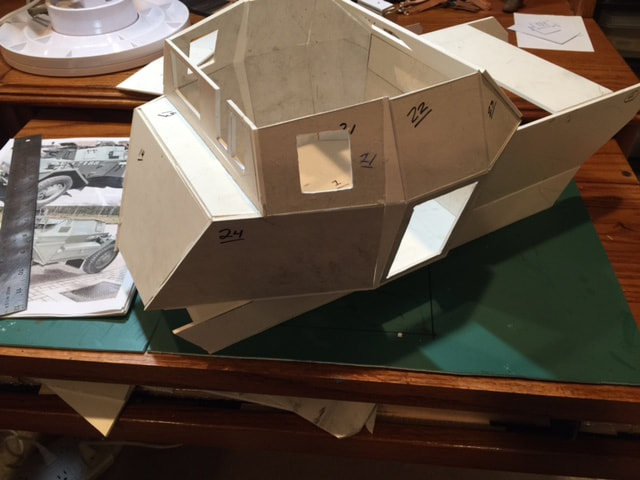
Here is the crew compartment from the backside. The overall shape is good, just a lot of fill work to be done to clean up the build.
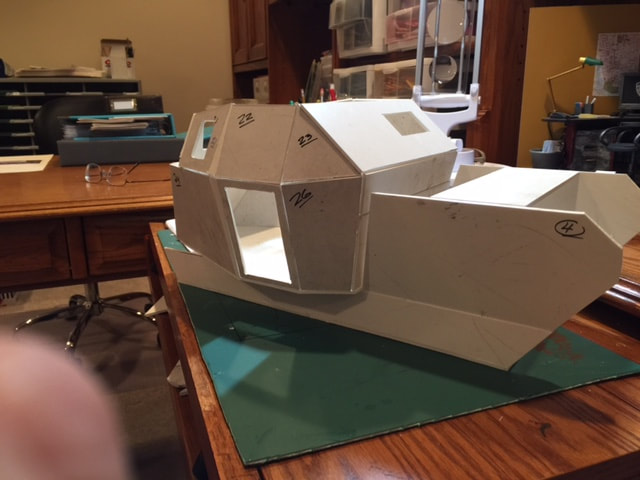
Below is the crew compartment sitting on the chassis/engine compartment section. This is the entire build as far as the templates go. I will be creating additional templates as I go forward with the build. |
I am encouraged because it is starting to sort of look like a Dingo and the scaling is good. The overall width, height and length scale out pretty well. I am looking forward to cleaning this part of the build up and getting started on new parts. More to come...STAY TUNED! - PM
|
|
PART III - 9/21/17
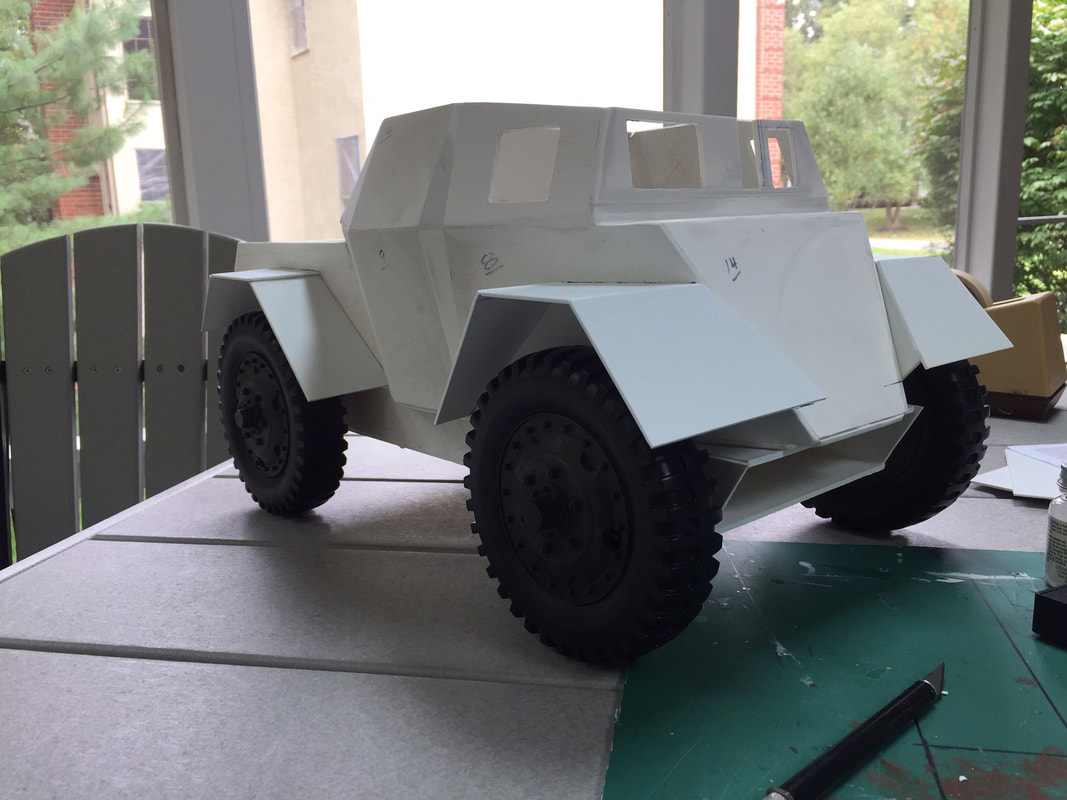
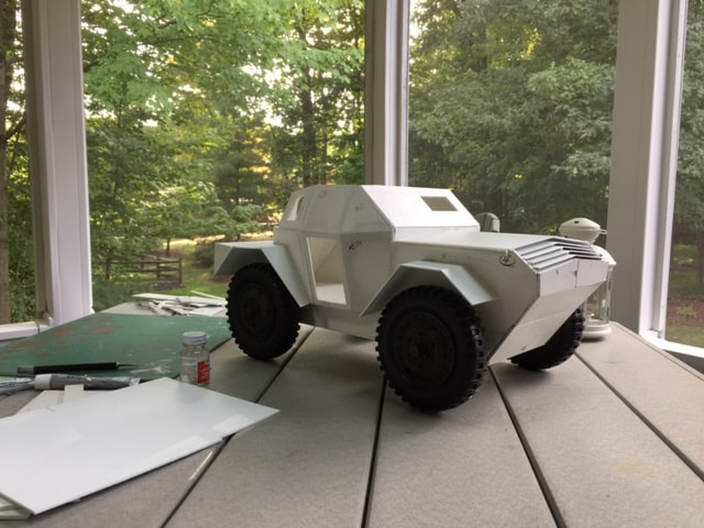
Well... here's another update on the DINGO project. It is actually starting to look less like a Sci Fi project and more like a vehicle project (that's a relief!). Got some temporary wheels on it and started adding some of the missing components.
First thing was adding some temporary wheels. These are the wheels from a Hasbro M8 Armored Car. The Dingo wheels were 33" and the Hasbro wheel was just under 6 inches (or a scale 3 feet). When I scaled up my plan, I included a scale wheel in the templates and the Hasbro wheel was right on the money. The wheel hubs are completely incorrect, but that is another project that I am currently thinking a lot about.
The next item was the sanding the crew compartment hull and making some fenders. There was a lot of fill work as mentioned in the last update and once the putty had plenty of time to dry, I spent a couple of hours sanding the hull. I still have some rough places that I am going to have to do a little bit of work on, but as you can see in the larger shot below, I have a good start. Next, I created some cardstock templates of the fenders, which I then used as patterns for the styrene pieces. Below, the fender pieces have been added to the model and it is starting to look a little like a Dingo.
|
|
Here the Dingo is sitting next to my TIGER I for a size comparison. It looks tiny next to the tiger (and that's a good thing). So this is where we were at the end of the day on Tuesday.

Wednesday, I started working on the rear of the vehicle. I hadn't really figured this part out yet and I spent quite a bit of time looking at a couple of other builds and prototype photos before beginning. It took me about two hours to get to this point (below), adding the back end panels and creating a support for an engine cover.
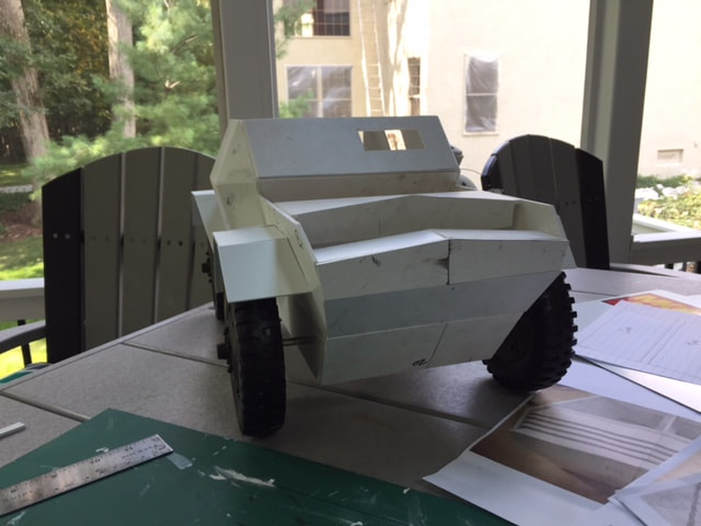
Another hour got us to this point... for lack of a better name, I will call it the engine vent grill. It actually turned out to be a lot easier than I thought it would be.
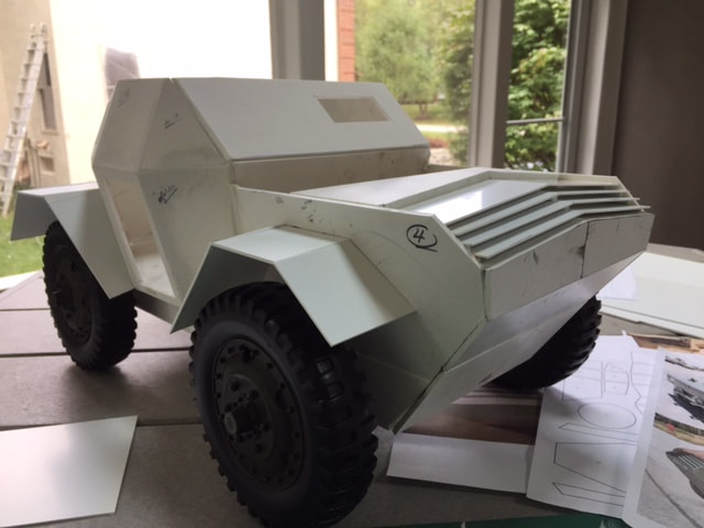
Here we are with the engine cover finally in place and you can see the start of the front stowage box on the front fenders.
That was pretty much it for Wednesday. I was tired and it was hot on the back porch. Plus the guys painting the house next door were absolutely exhausting me.
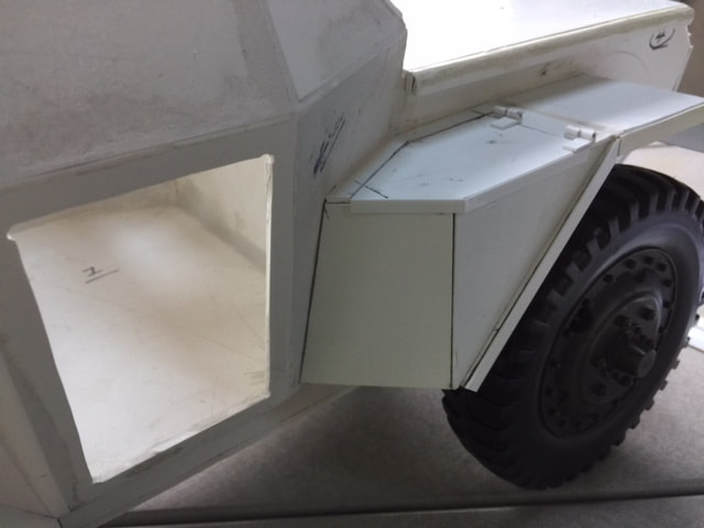
Today, Thursday... I didn't get near as much done as I had hoped. It was yard day, which took the morning and it was even hotter today than yesterday. Seemed like it took much longer to get anything done as well. I made a cover for the front stowage bin and created the small stowage bin on the rear fender. The front bin will not be functional, but the small bin is and that was what took so much time. Thought I would never figure out the angle for the top and then get the hinges to line up correctly. I also faced the fenders on this side of the vehicle with some styrene trim.
Hoping tomorrow to be able to work on the boxes on the other side of the vehicle. They are a little more complicated, so no telling how long that will take. But I am encouraged, it generally looks like a Dingo. Stay tuned for the next update!
PART IV - 9/23/17
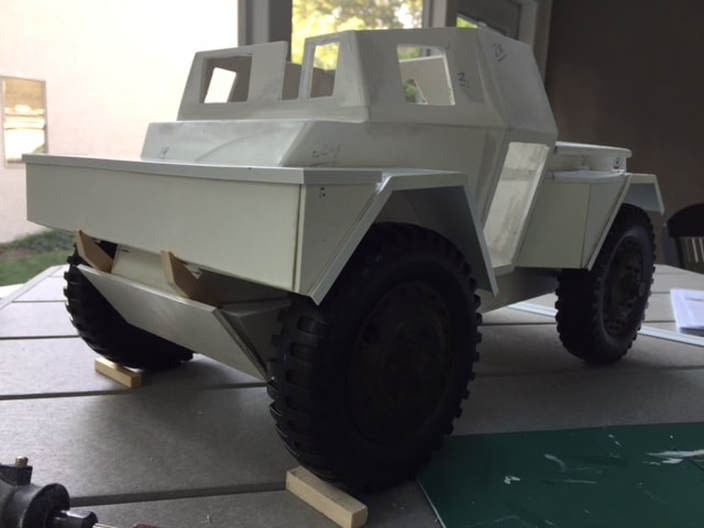
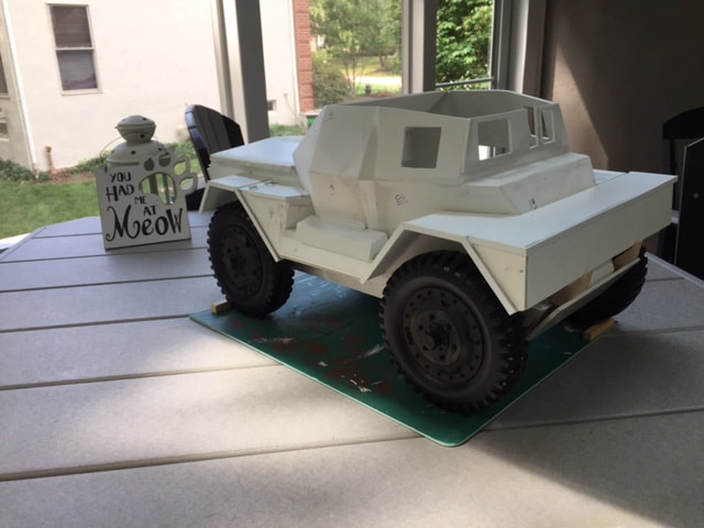
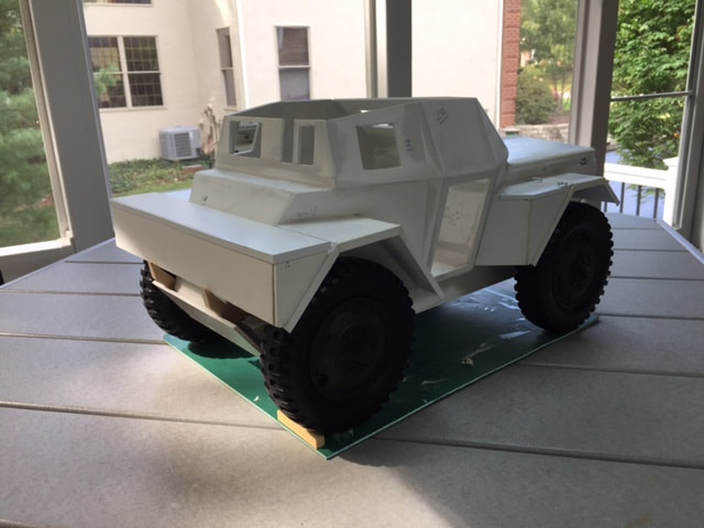
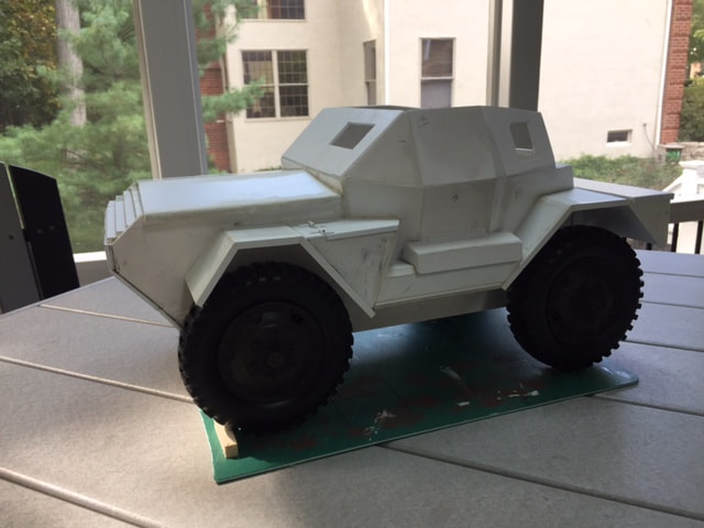
Well... yesterday I got to the stowage boxes on the other side of the vehicle. I though it was a fair painful process in terms of fitting and refitting....and refitting. The four pictures below show the current state of the project. After completing the driver's side stowage boxes. I did quite a bit of putting here and there, which means that now there is a whole bunch of new sanding to do. Fortunately it was time to head to the hockey game.
Well... yesterday I got to the stowage boxes on the other side of the vehicle. I though it was a fair painful process in terms of fitting and refitting....and refitting. The four pictures below show the current state of the project. After completing the driver's side stowage boxes. I did quite a bit of putting here and there, which means that now there is a whole bunch of new sanding to do. Fortunately it was time to head to the hockey game.

And that is where it stands as of this morning. Think I am going to work on a master for the wheels today (I hate sanding). More to come. - PM out!
PART V - 9/24/17
Worked a little bit on the wheel master yesterday and today. The first order of business was to cut the tire in half so that I could create a front and back mold of the wheel. Using my trusty Dremel tool, I found this operation to be fairly scary. I use metal circular saw blades that I get from Micro Mart. They work great, but will cut through skin and bone just as easily as styrene and vinyl. I'm just saying... I like to be cautious when I am using one.
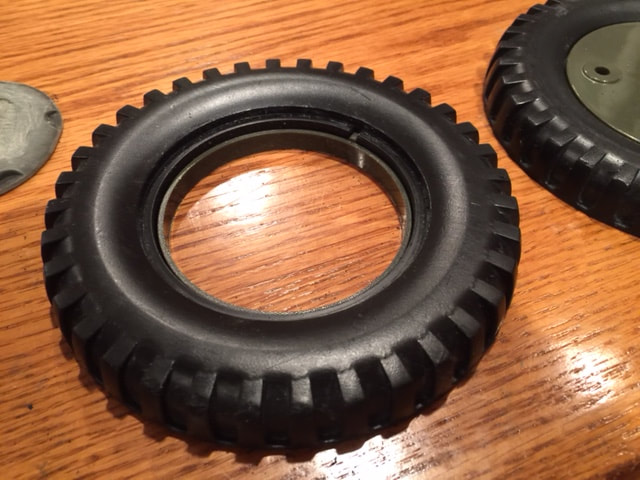
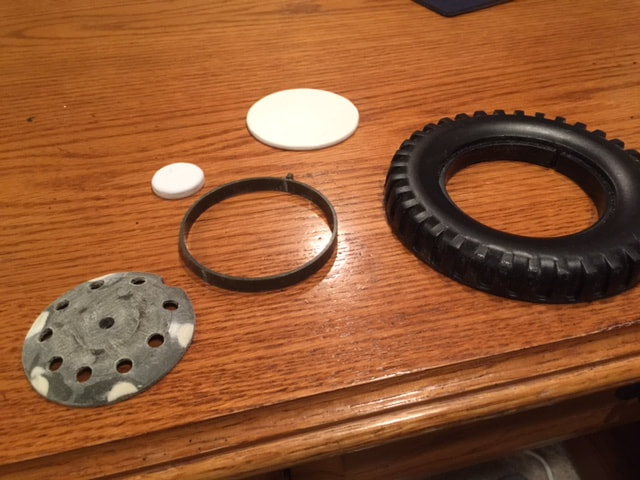
The wheel/rim was actually removed for the purpose of cutting the tire in half. I will use the back part of the rim for the back tire mold (as shown on the right. But a new rim has to be created for the front wheel mold. You can see here that I cut a circular piece of the rim side to become part of the new rim detail and I cut the center out of the face of the wheel to rework it as well.
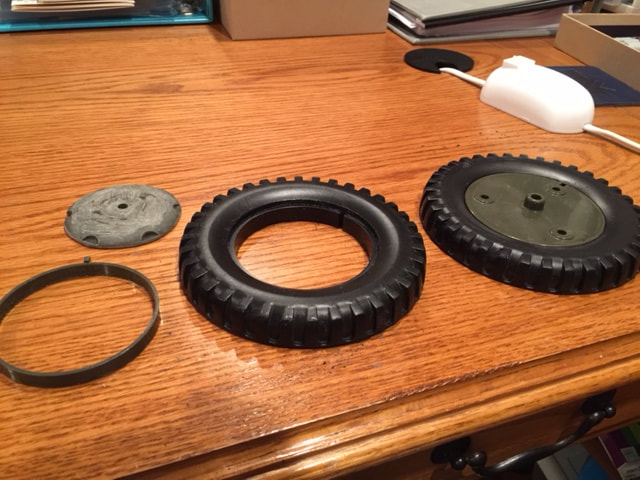
The photo below shows how the thin circular ring will be used as part of the final rim. The facing piece of the wheel has been dropped into the center to show where it will end up eventually.
Here is the next stage of this build. The top two pieces of styrene are the back of the rim and the small circular part that sits in the center of the finished rim. You can also see that I have added the 9 holes that are a feature of the Dingo wheel.
For me, drilling these nine holes was actually more frightening than the initial tire splitting. If I messed this up, I wasn't sure how I would proceed.
|
|
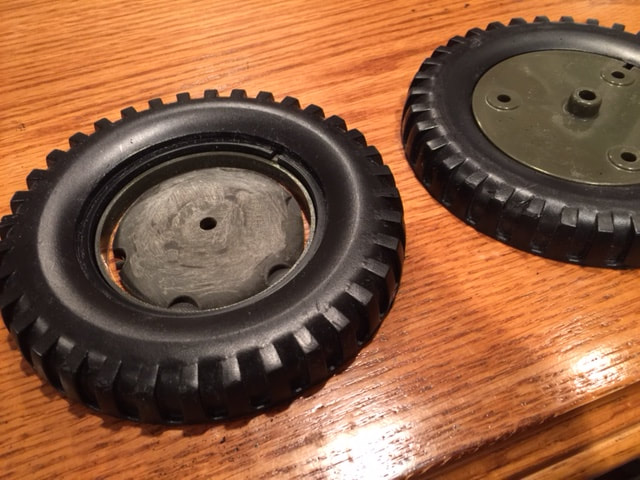
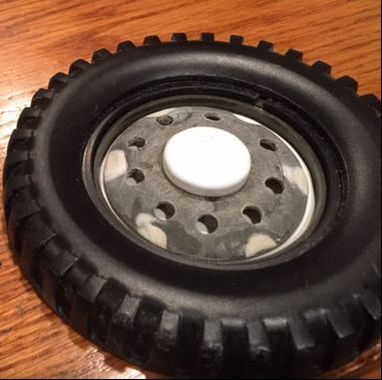
Below is a shot of what it will sort of look like. I still have some additional fitting, filling and detailing to do, but it is getting there. It is certainly starting to look like this part of the project is going to work.
|
I should finish the master this week and as soon as I pick up some mold compound and resin will be ready to start casting wheels.
Also on the docket for this week is to finish with the fill work (puttying) and then a whole lot of sanding. I should have at least the basic build finished in time to show at our October SSCC Meeting in Cincinnati. |
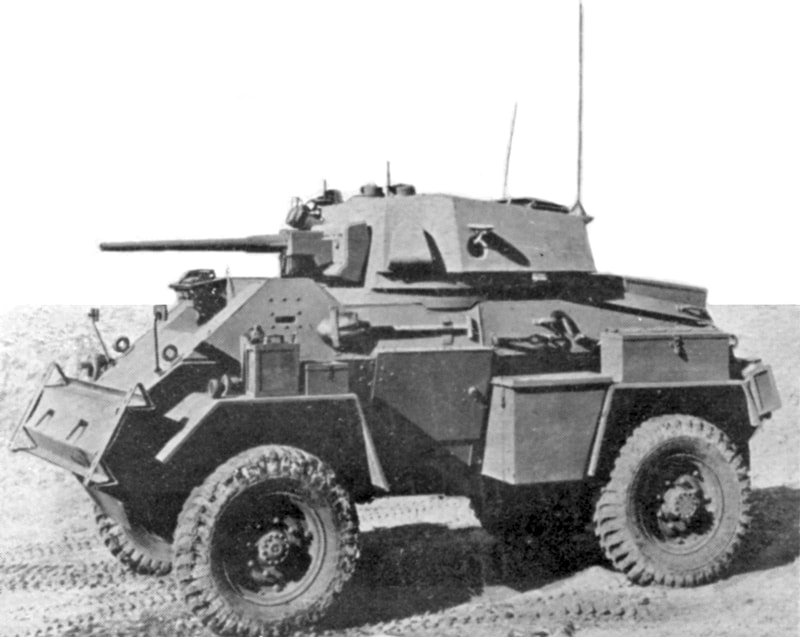
In the meantime, I have already been thinking about my next British build and I am leaning toward the Humber MK IV armoured car at the moment. It is between this and the Staghorn. The Humber is about a half a foot shorter and has no complex curves, which is more appealing to me. I will have to locate a 7" wheel to make it work though. That should be an interesting search. Well, that is all for this update, later - PM