BRITISH UNIVERSAL CARRIER (BREN) PROJECT
|
I had always wanted a Bren Carrier to go with my Dingo and I finally got my chance to snag one at the 2020 SSCC Figurecon. Long distance member, Andrew Laschuck came down from Canada to the show to display and I was able to purchase one from him that he had scratch built. He had built it as a Canadian vehicle and I decided that when I got around to detailing it, I would change the fenders.
|
|
Not long after I made that purchase, friend and fellow club member, Phil, had Andrew make him a Bren as well. Though he asked Andrew to do the British version of the fenders, which greatly simplified the detailing of his vehicle. We decided that we would work on them together.
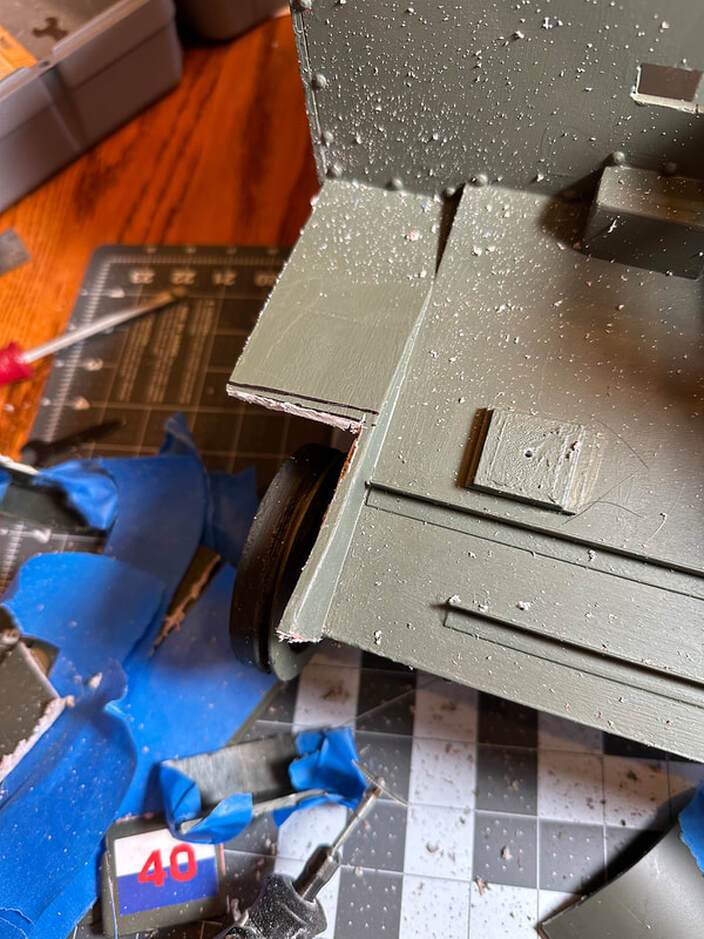
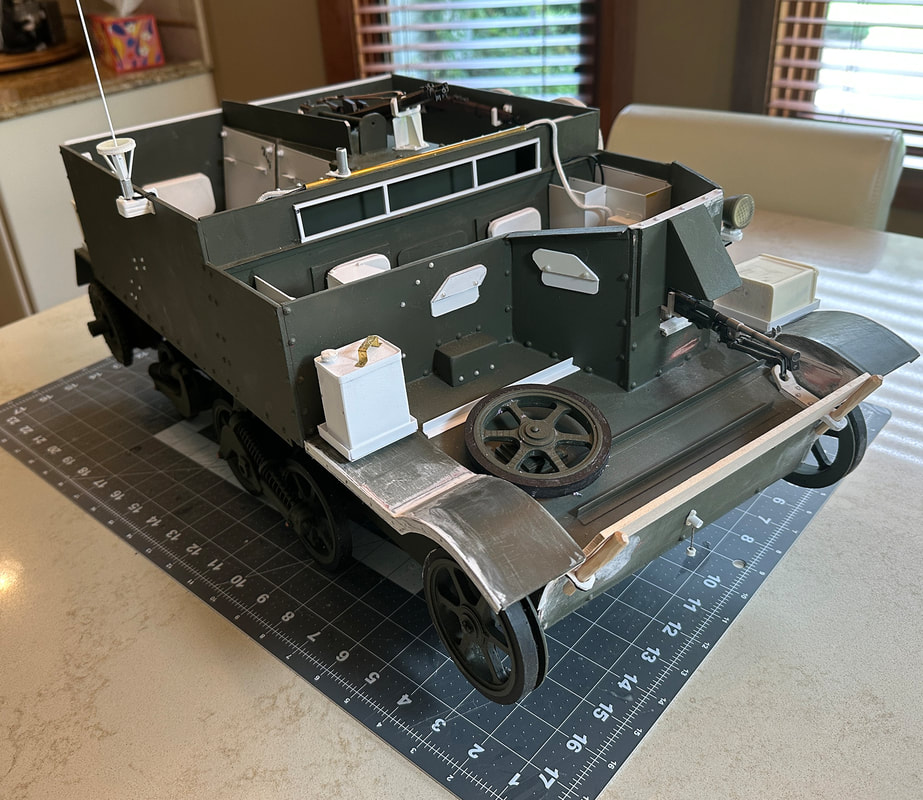
I finally decided that after three years, it was time to finally start on the project, which I began with the removal of the straight fenders on the front of my vehicle. I don't mind telling you that it was nearly as scary as the first time I cut up a Stuart. And actually... the curved pieces that I found to create my new fenders, came off of a Stuart.
I will not apologize to anyone that wants to argue that I have done it incorrectly. After looking at several hundred pictures of Bren online, I am convinced that during the war, these fender took many different shapes (or were bashed and beat up into different variations).
I will not apologize to anyone that wants to argue that I have done it incorrectly. After looking at several hundred pictures of Bren online, I am convinced that during the war, these fender took many different shapes (or were bashed and beat up into different variations).
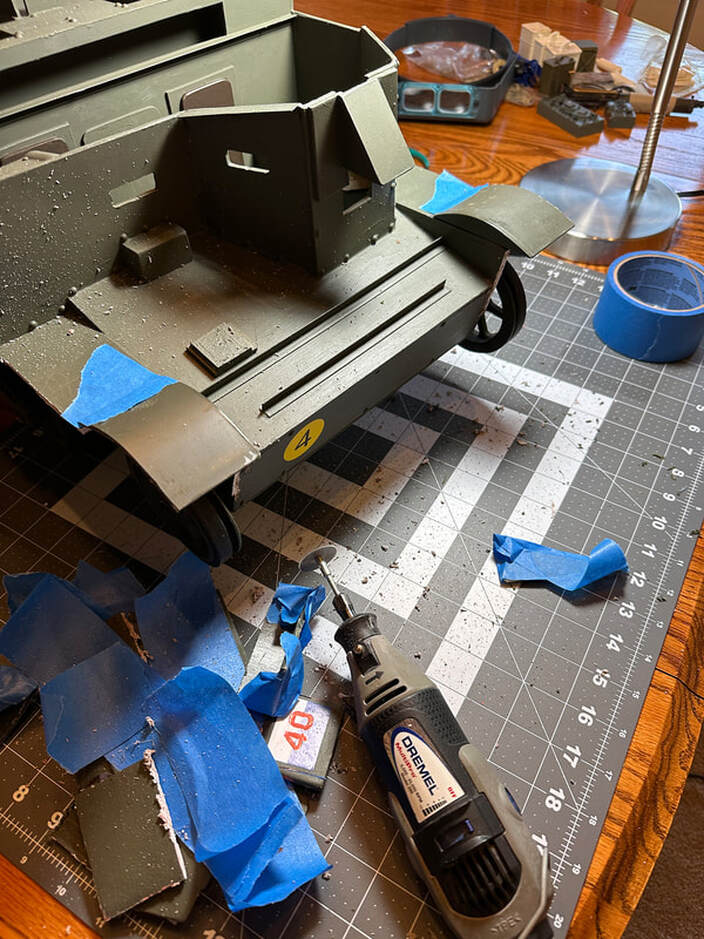
After getting the basic shape the way I wanted it, I then added some styrene to fill the gaps and a liberal dose of modeling putty.

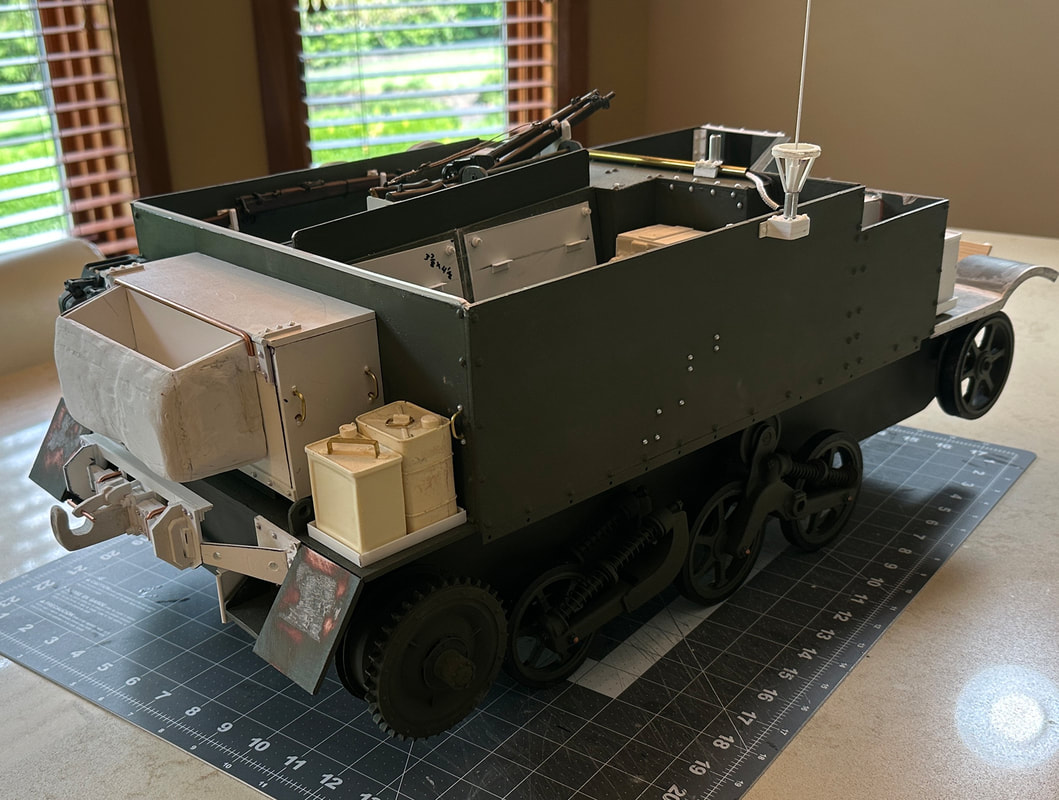
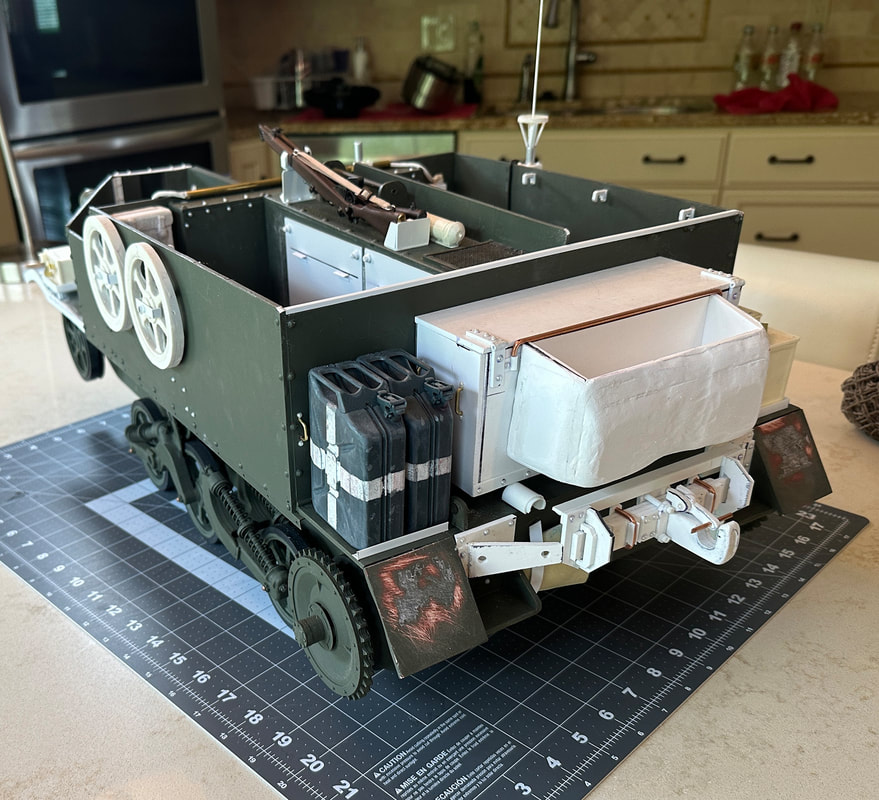
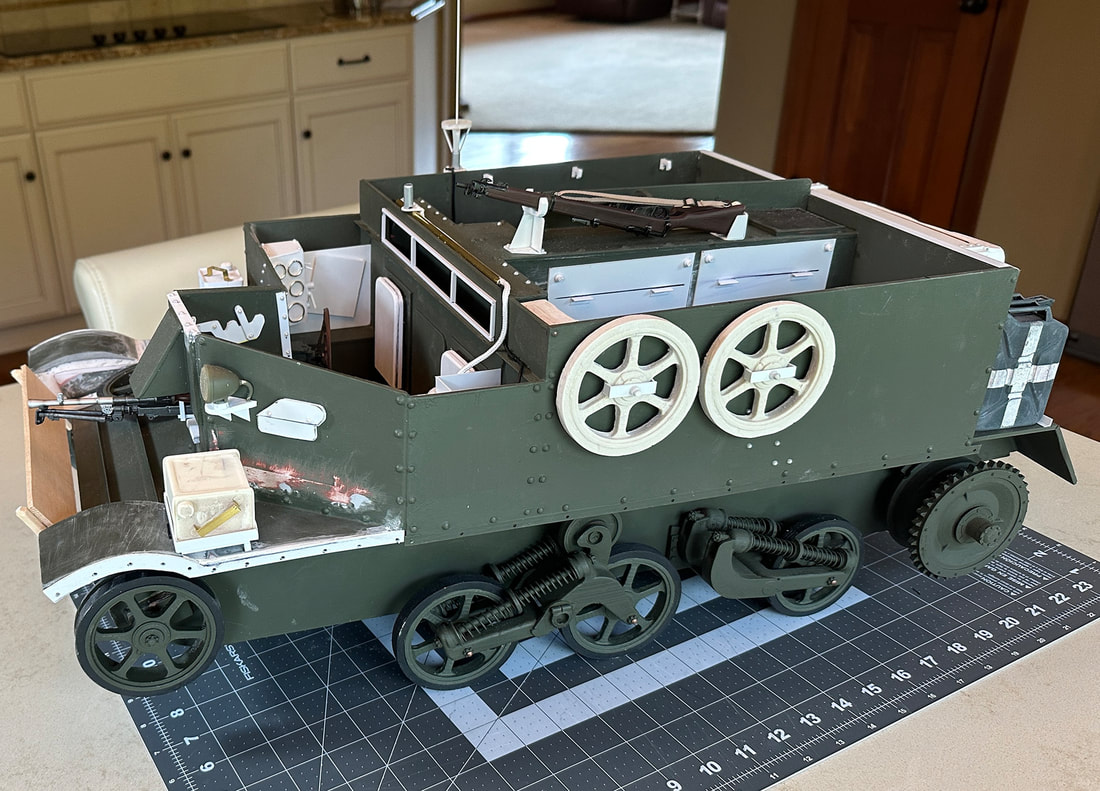
Next piece I tackled on my vehicle was the bit at the back. I found several examples with his arrangement on the rear of the vehicle and I wanted to do the same. This little bit took nearly an entire day to do (mostly because I had to figure out what I was looking at and how to create it). There were still a couple of details that I needed to add, and I got to those the next day when I went after the pieces above the tow bar.
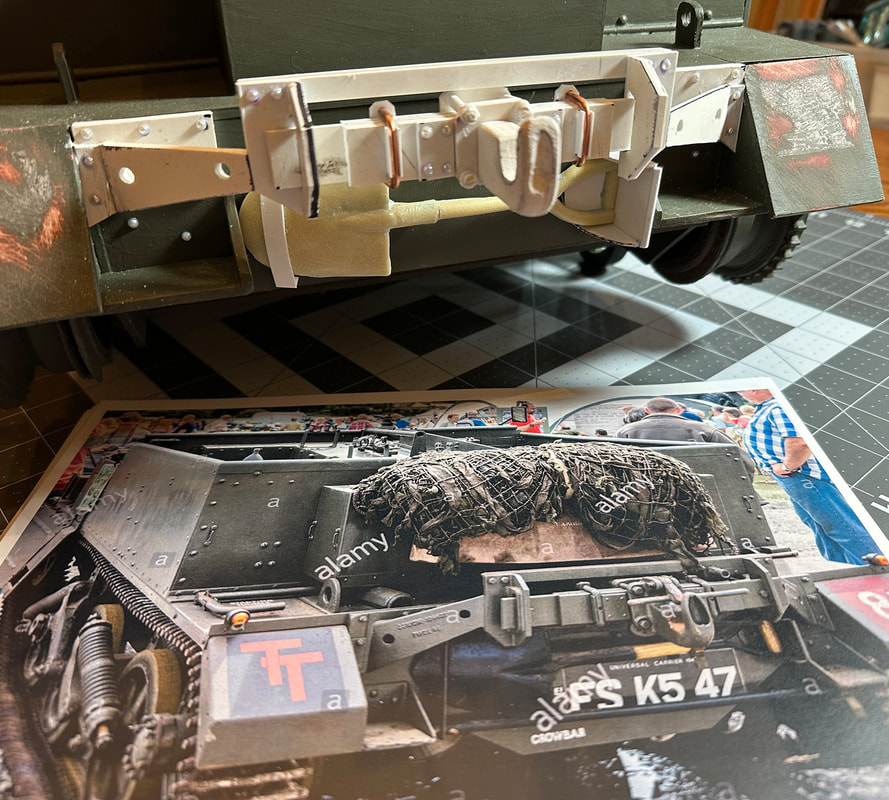
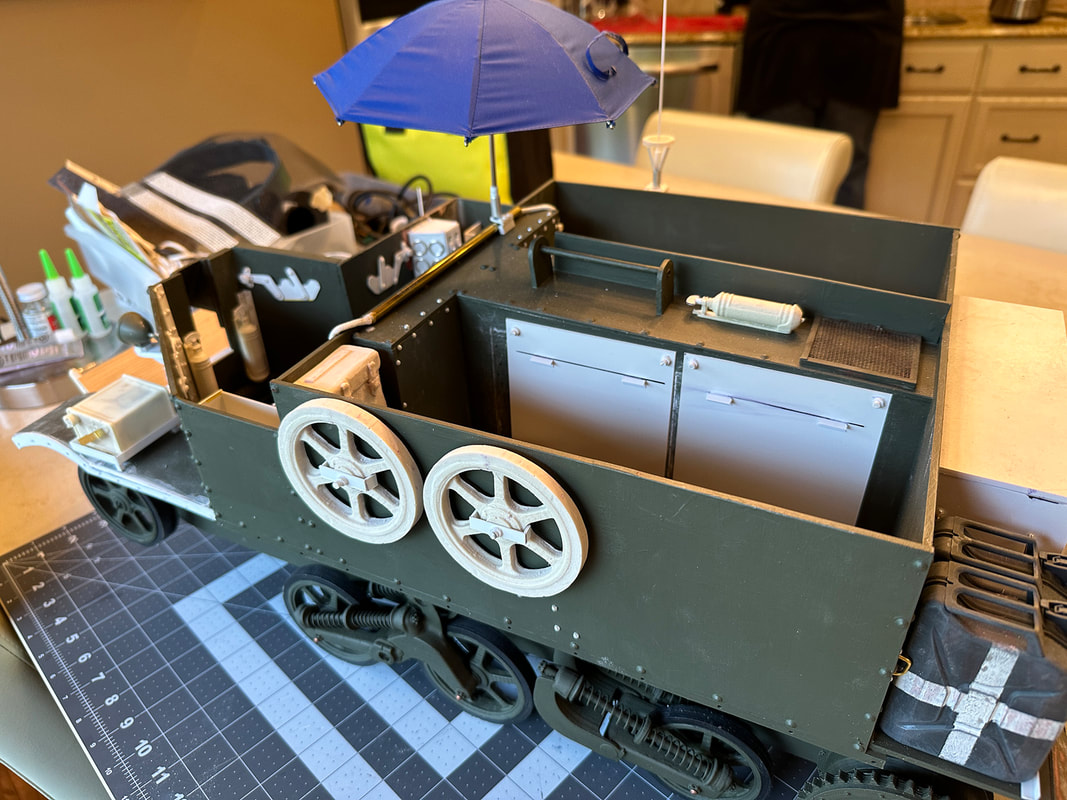
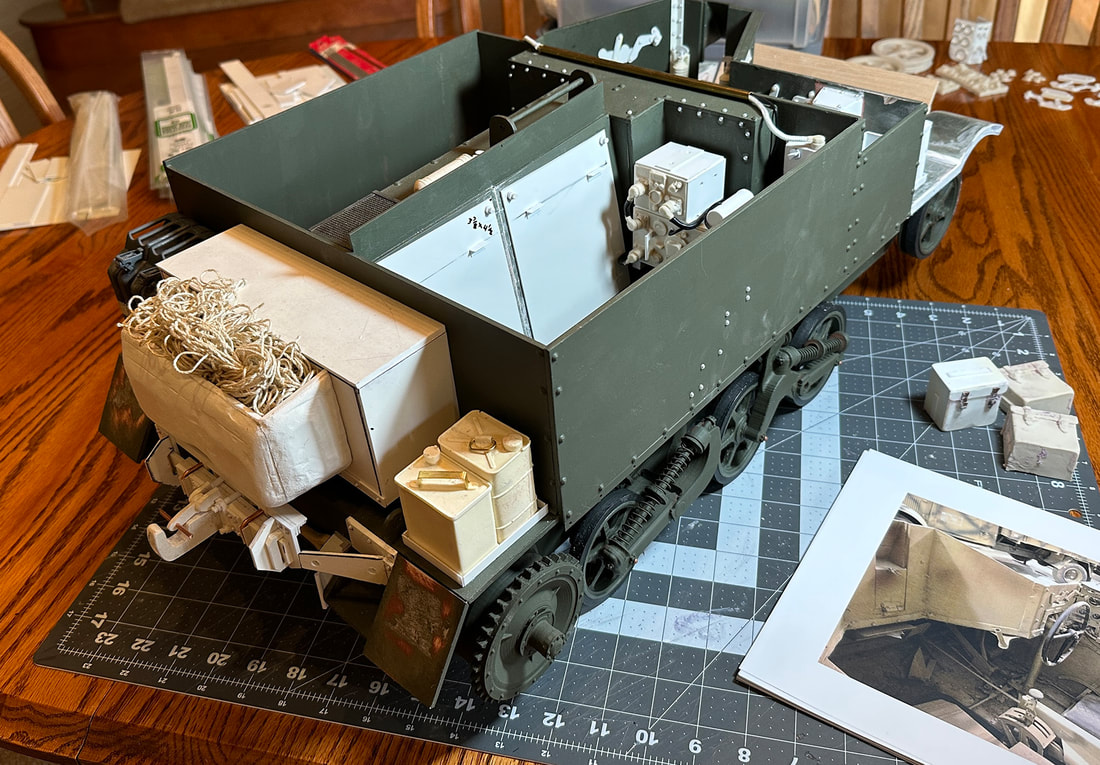
I wanted to enlarge the size of the equipment box and add a "bag" like I had seen in a variety of examples. I didn't try to remove the smaller box that was already there. I just covered it with a new back, top and sides. The "bag" is simply some thick layers of styrene t hat were then attacked with the Dremel tool until I got the shape I was looking for.
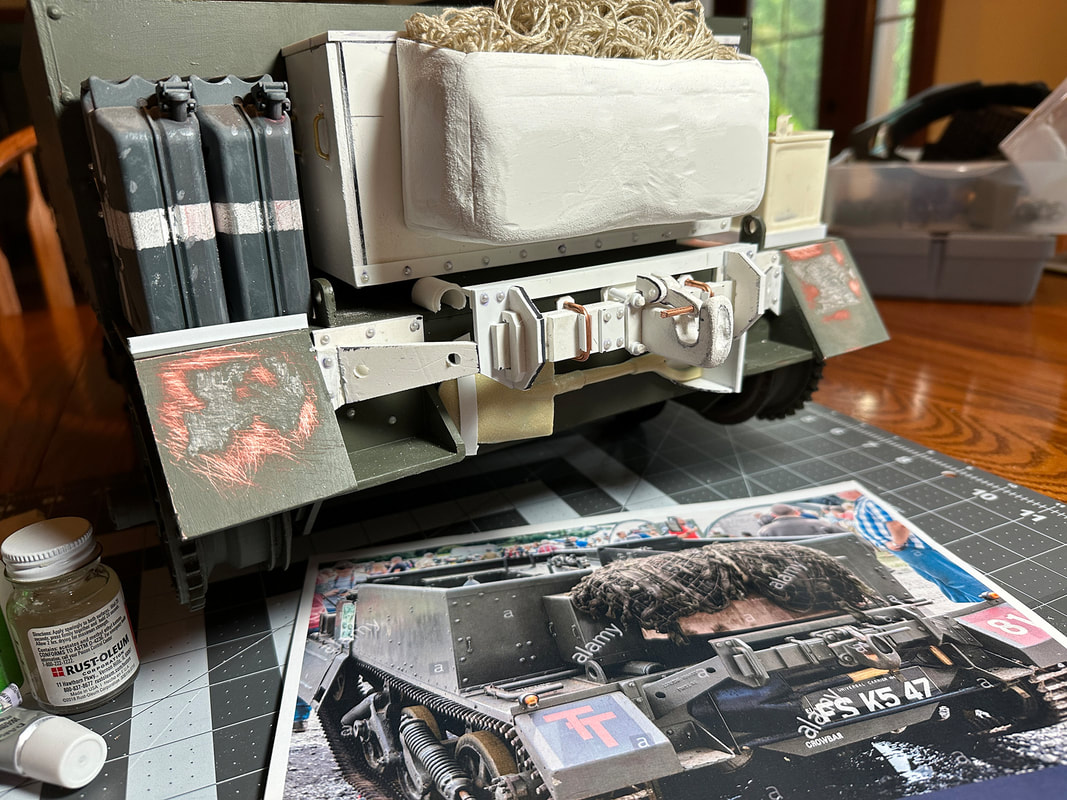
Other details such as can racks and vision port covers were created from styrene. I was one casting short on the cans, so I had to make one from styrene to get to the correct number.
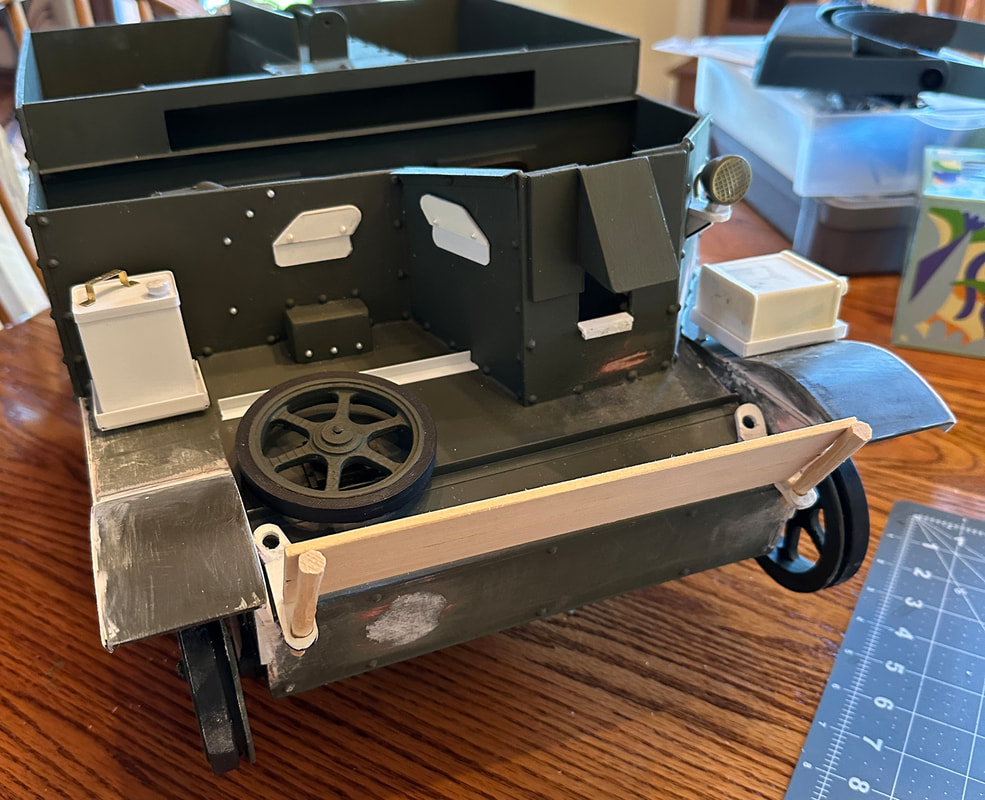
Reference pictures showed a variety of different kinds of lights on the various carriers, including something that looked similar to what I ended up doing. The light was attached to some discarded Hasbro parts, I just had to make a mount for it.
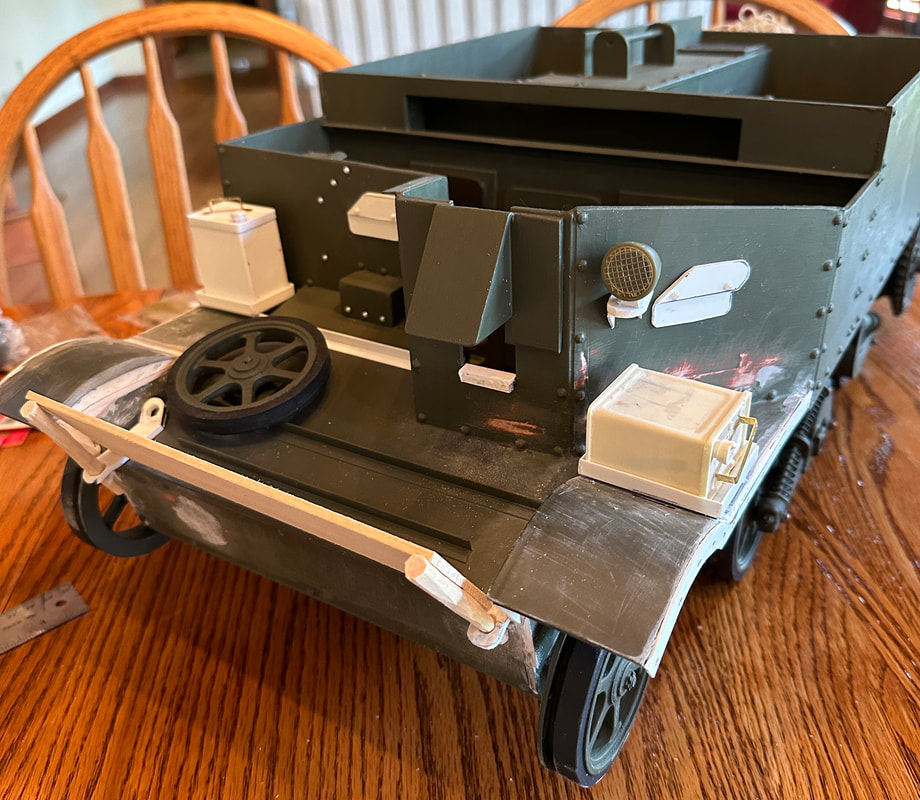
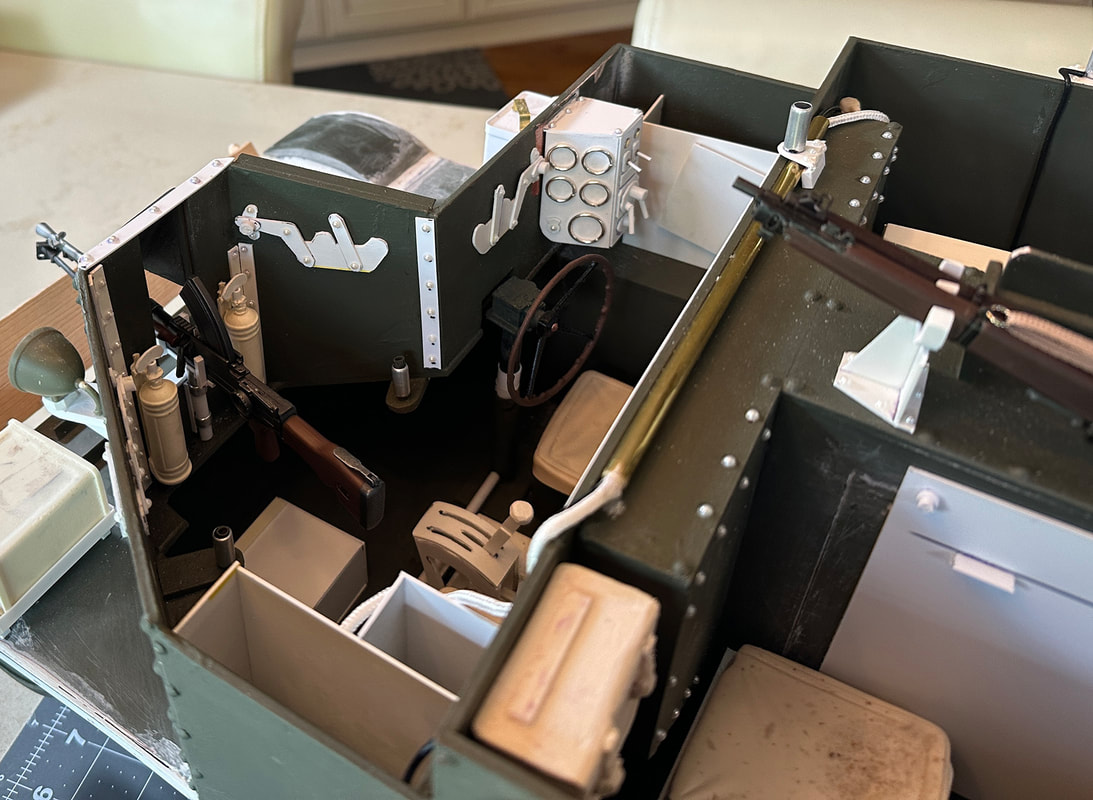
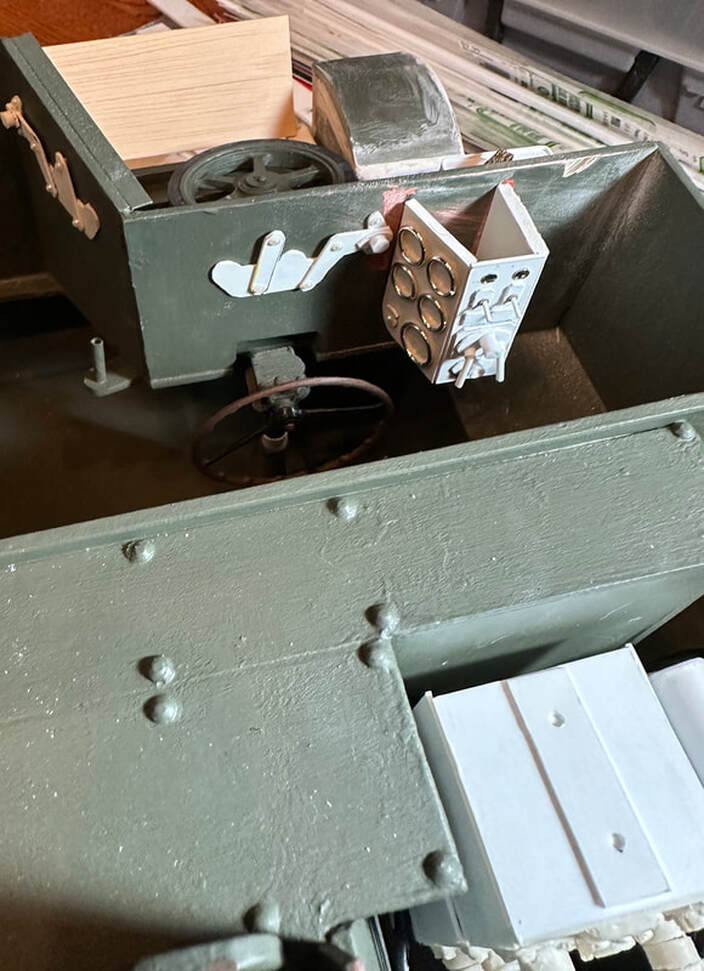
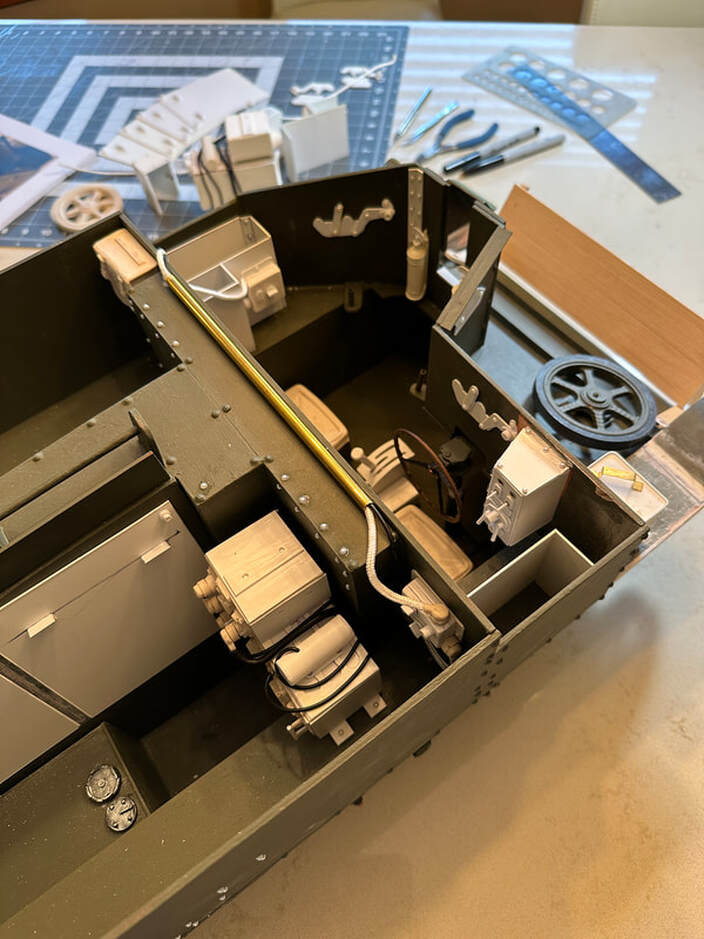
There were a variety of instrument panels used in these vehicles and I have no idea which version it is that I picked, but I ended up scratch building a new instrument panel and then creating art on the computer for the gauges. (you'll see that later on). There was nothing wrong with the panel that Andrew had put in the vehicle, but I was just looking for something different.
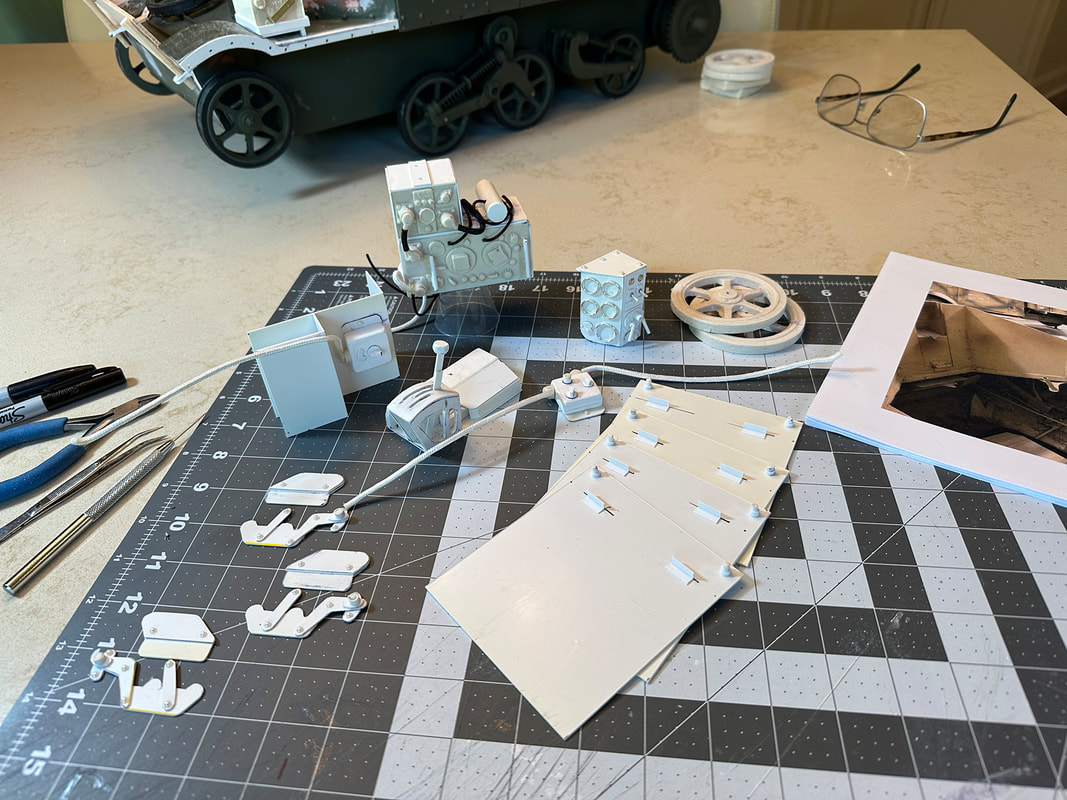
I knew as I began trying to detail my Bren that I would need a lot of the same details for Phil's Bren, so I started making two of everything. Here you can see that I started that process with the instrument panel.
The vision slots each had an outside cover component and an in cab component which would have operated the outside piece. Here you see my instrument panel in place and the vision slot mechanisms that I made from thin styrene.
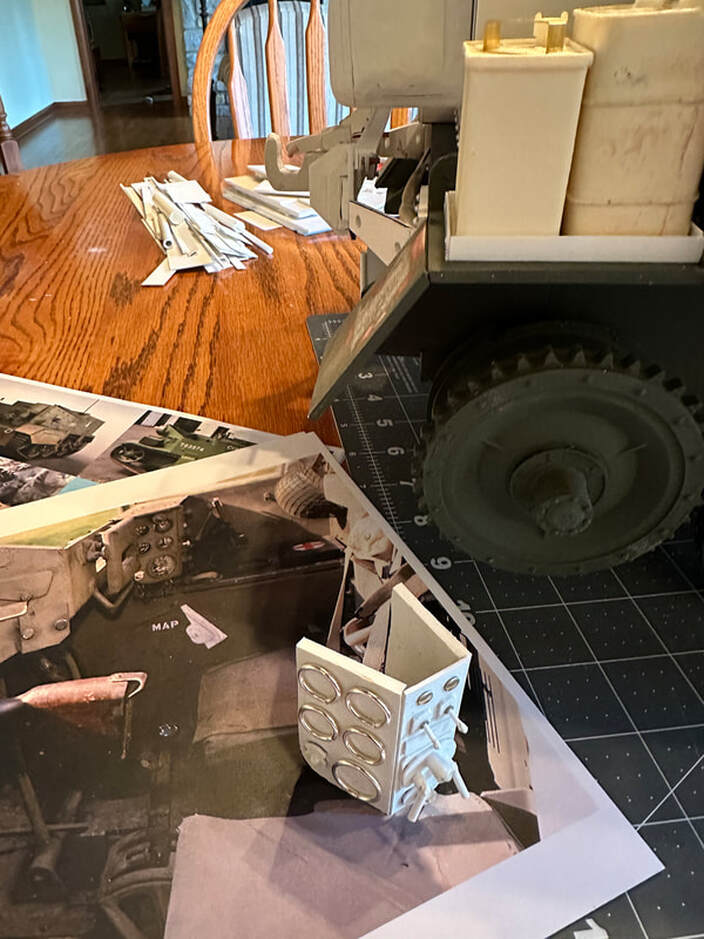
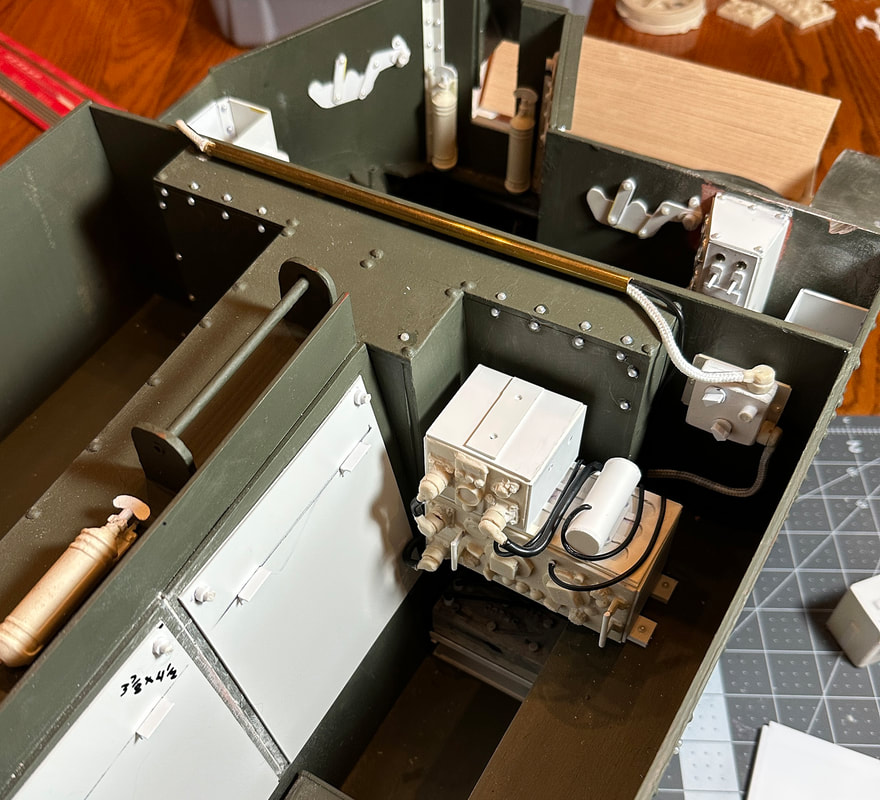
I had seen multiple examples of Carriers with radio gear and I knew I wanted to do the same thing. Years ago I was given a casting of the radio fronts and I made a mold so that I could create additional radios as needed. Here is my radio gear in place. I also made new covers for the engine compartment because I wanted them to have a little more depth.
It seemed that some of the Bren examples had some kind of storage boxes on each side of the drivers compartment. Some of them had covers and I found one example that seemed to suggest that the covers were sometimes removed. I like that idea because it gave me a place to have additional crew details that were visible.
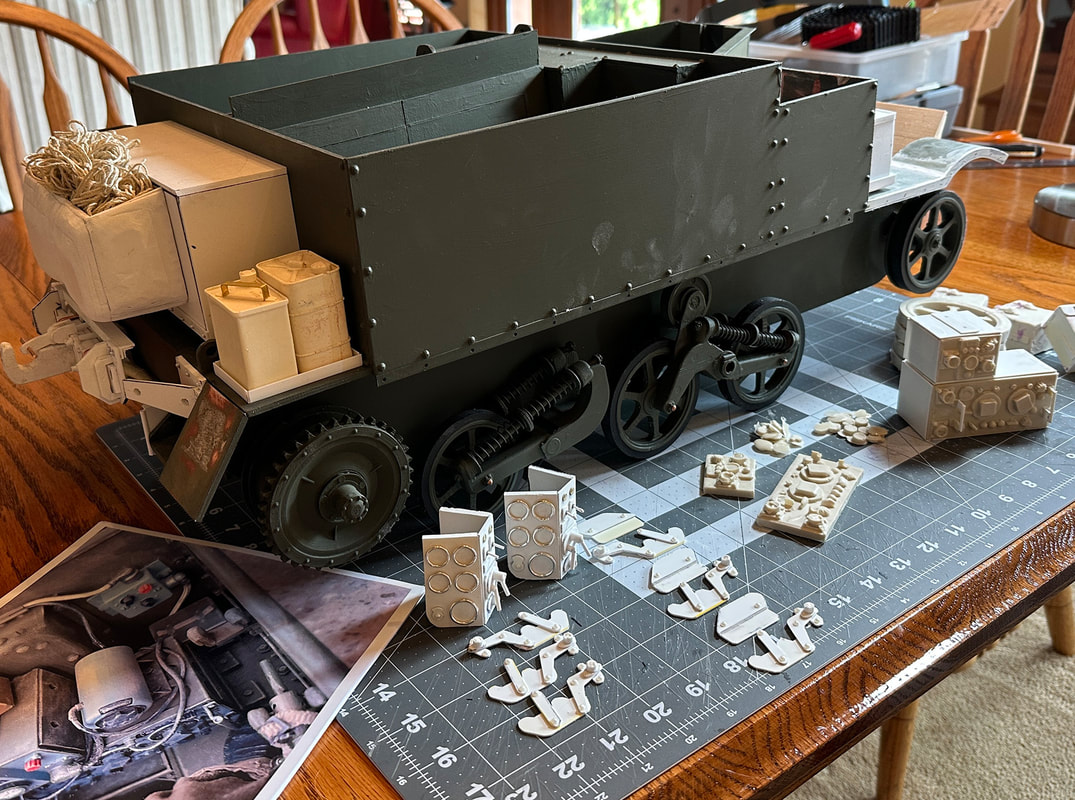
As I stated above, I was making Phil's detail parts at the same time as mine. Here is a collection of the first "phase" of parts that I created for his vehicle. It was shortly after this picture was taken that we got together for his first session and we installed all of these items on his vehicle.
After that, I went on to stage two, adding things like extra spare road wheels and racks for small arms, etc. At this time I also made the setup for my radio antenna and a mount for the Bren machine gun.