BEHIND THE SCENES - The vehicles of the 37th
I don't think I have ever shown these shots before. These are my reworked vehicles prior to painting. I wanted all of my vehicles to be a little more realistic than they were during the days of the HAUNTED M5. That meant new periscopes (my casting off of an original styrene build up), functional grab handles and tie downs, working shackles and brass periscope guards for my Stuarts. I tossed the lamp guards and made new ones out of brass as well.
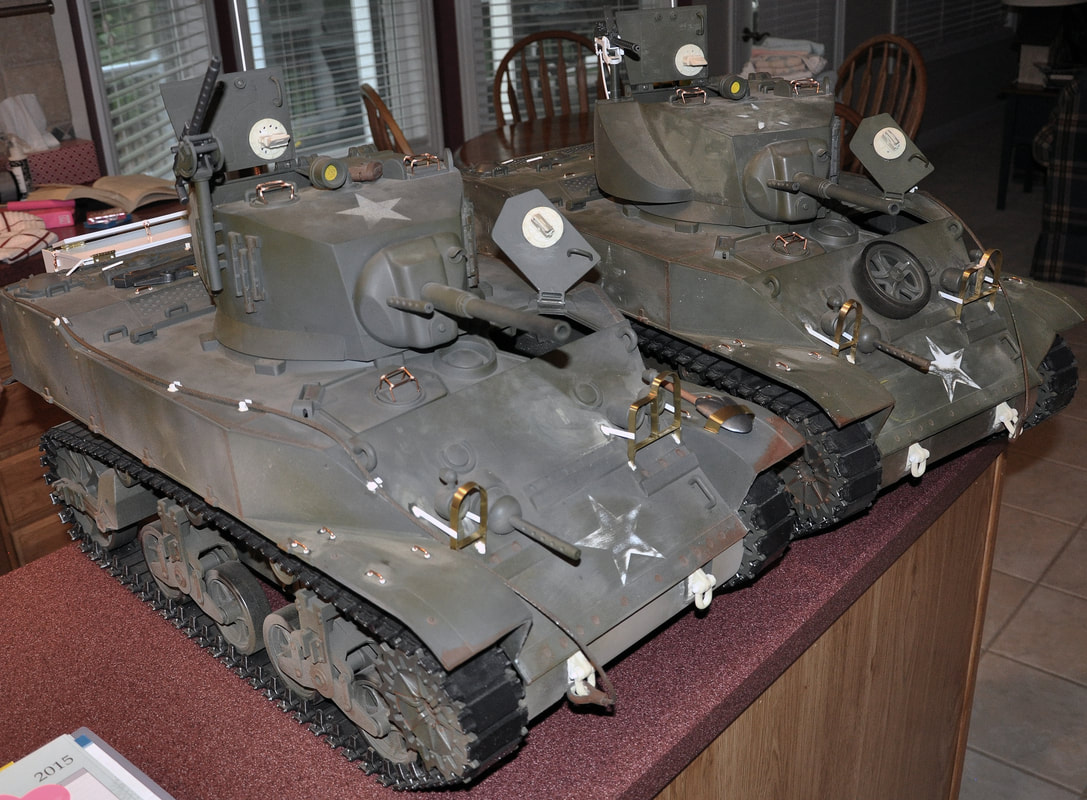
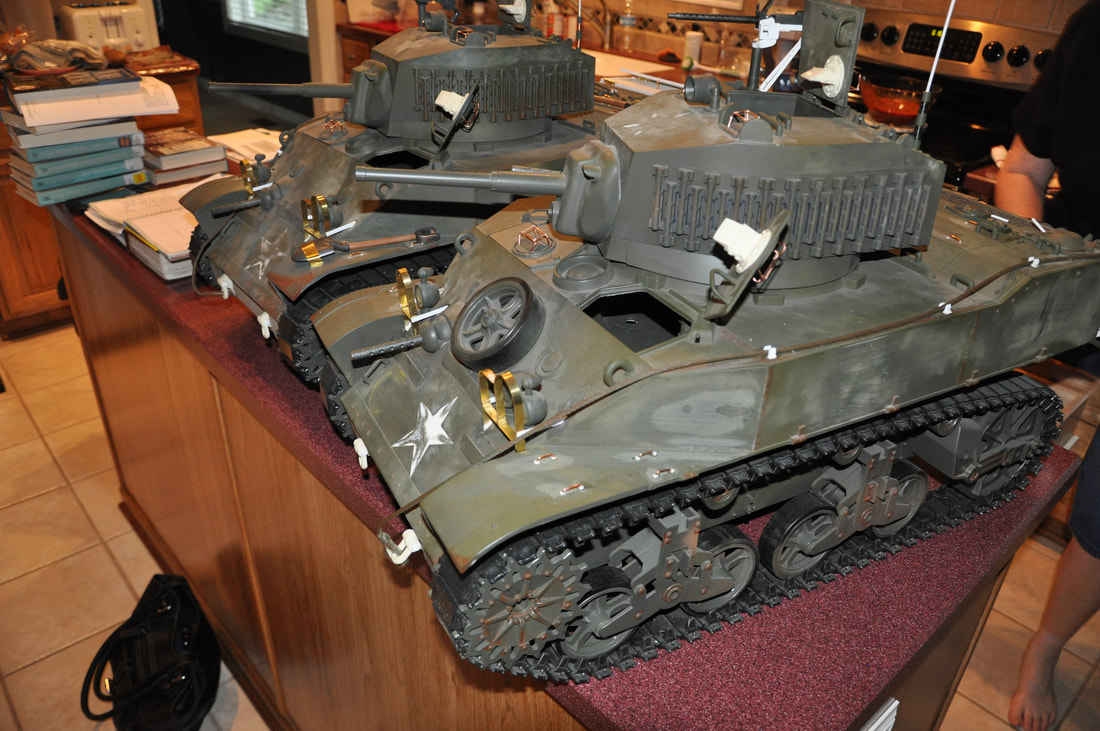
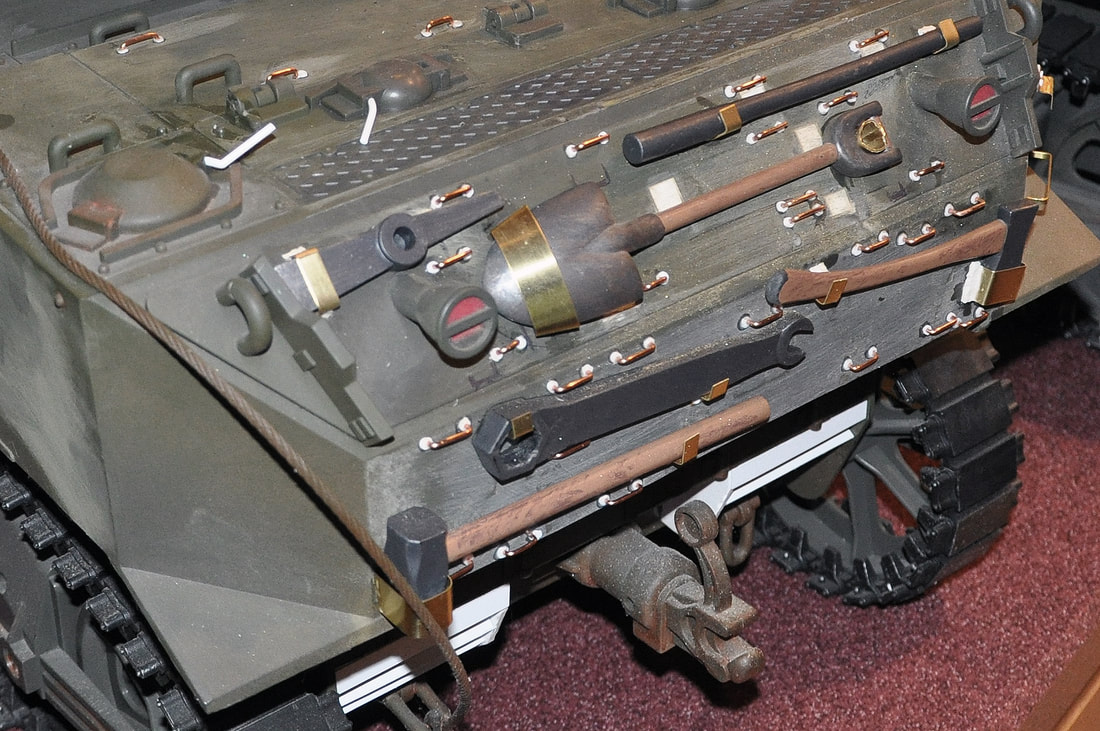
Each of the Stuarts has some details that are the same, but there are some that are different as well. On this particular stuart, I removed the plastic brackets holding the tools, filled the holes and then made new hardware from brass and styrene...and tie downs, tie downs, tie downs. The tools were also rearranged as much as was possible in the correct positions. Notice also the vented engine compartment below.
|
On the second Stuart I wanted to build a tool box as was seen on many ETO Stuarts. That meant reworking some of the tools on the upper deck (and more tie downs. That lid on the tool box is not a function lid and the items that eventually ended up in the tool box can actually be removed if desired.
|
|

|
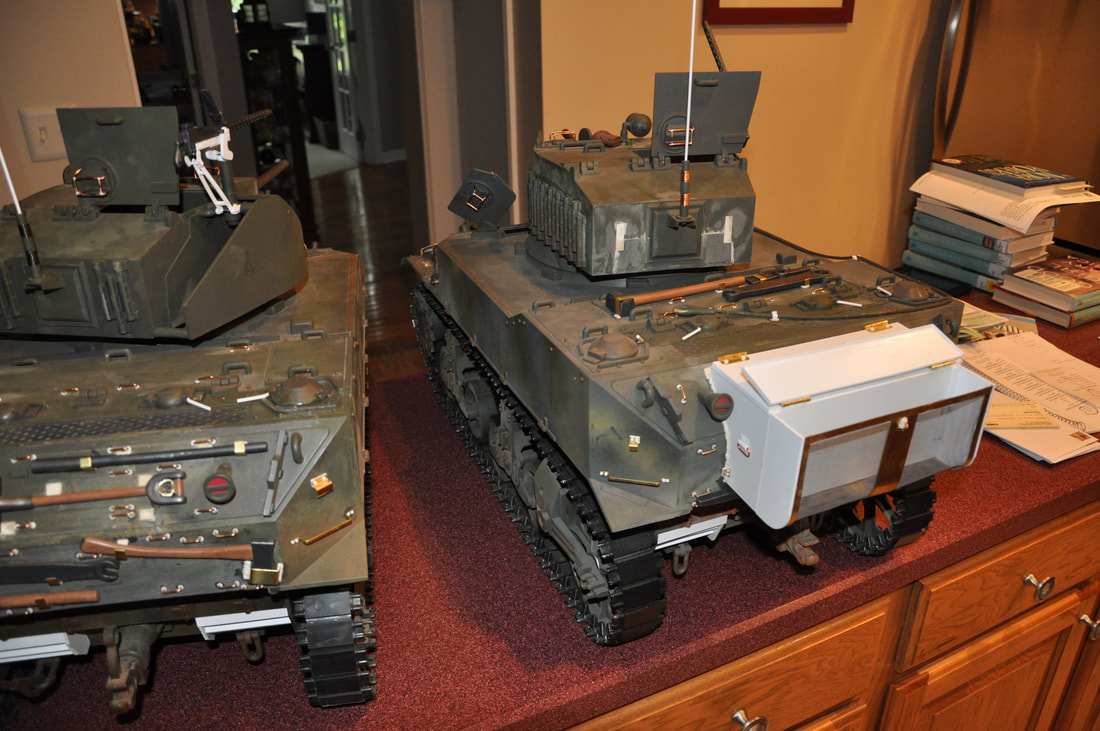
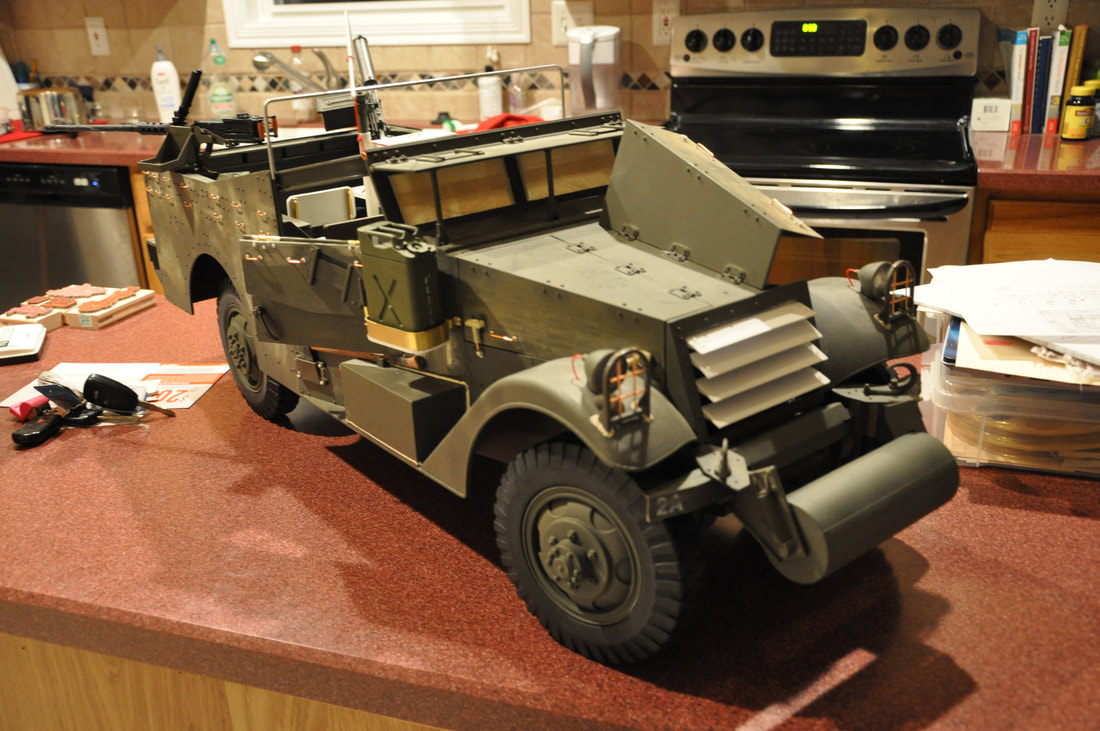
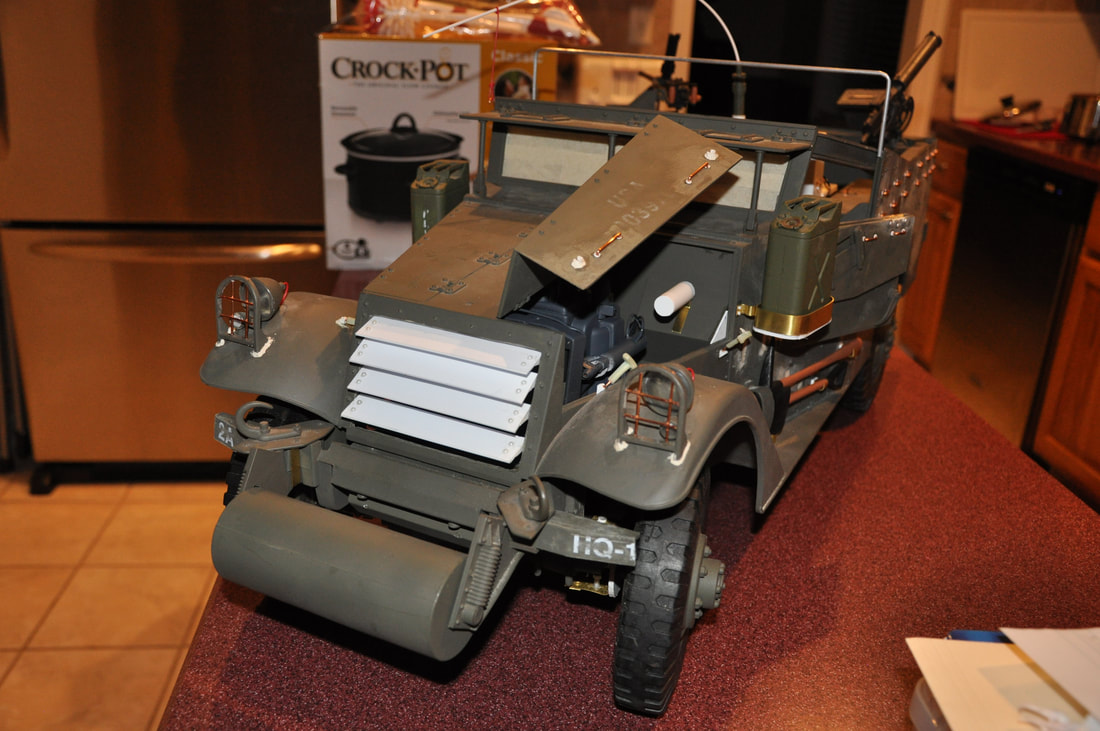
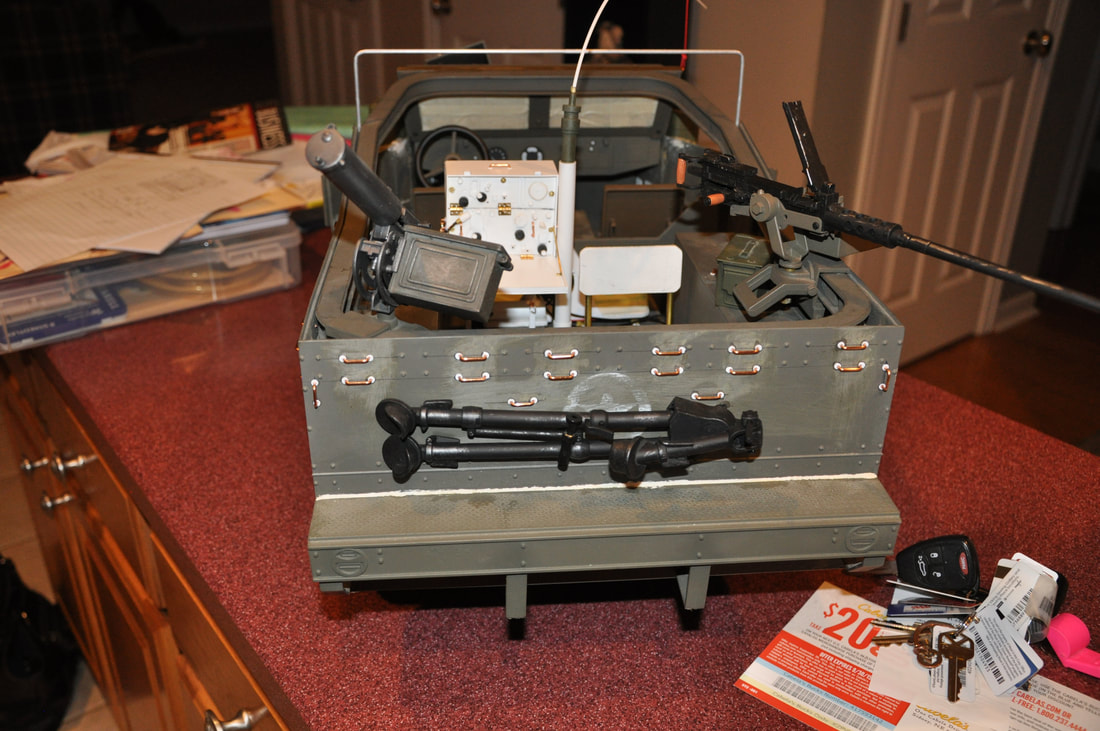
I actually think that my White Scout Car project was more difficult. By the time that the American army actually hit the beaches of Normandy, the scout car had become obsolete and was only used by a few units, mostly Military Police. The British and French were still using them, but not too many American units. I did find a picture of a vehicle with 37th Tank Battalion markings on it, so that was all I needed to justify my
"unit radio vehicle". The vehicle was pretty heavily modified; the front grill was opened up and all of the fake tie downs were removed and replaced with functional tie downs. I never thought I would finish that little project. Also, the other big change was lowering the gun rail so that it looked like the prototype.
"unit radio vehicle". The vehicle was pretty heavily modified; the front grill was opened up and all of the fake tie downs were removed and replaced with functional tie downs. I never thought I would finish that little project. Also, the other big change was lowering the gun rail so that it looked like the prototype.
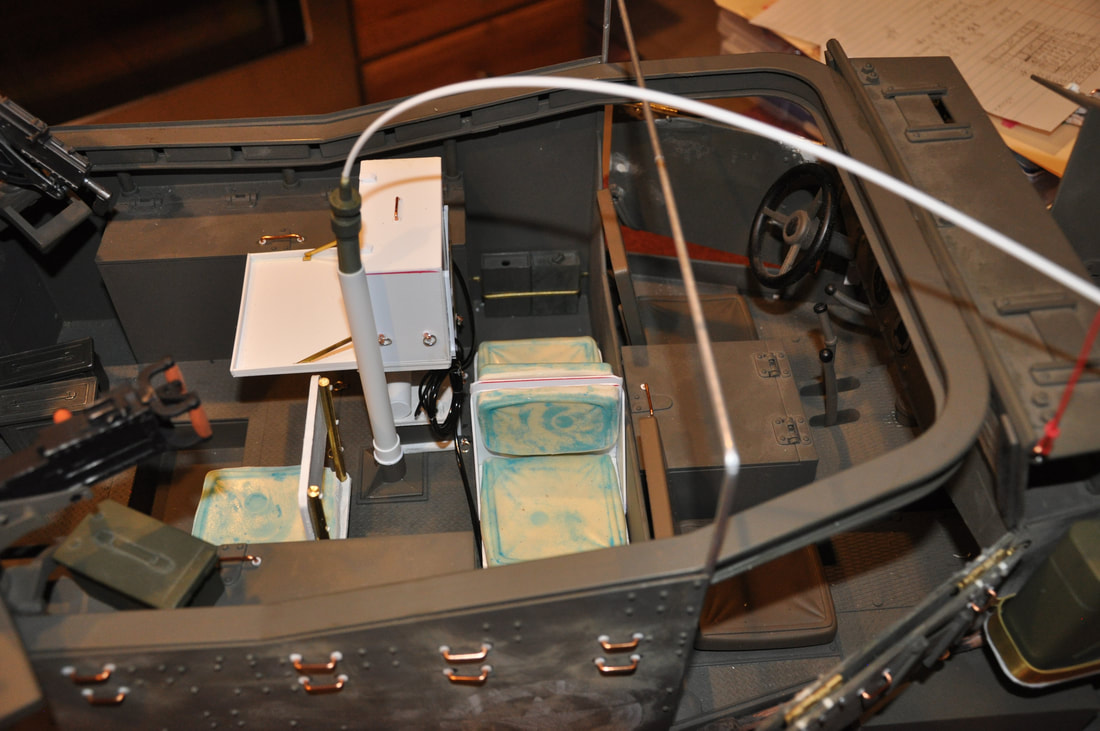
I wanted to add seats to my rear compartment, so I used one of the front seats to create a temporary mold to make additional seat cushions. The new seats are made of resin, styrene and brass road. You can see also that the doors were re-hinged so that the top half would hang correctly rather than sticking out at a weird angle.
|
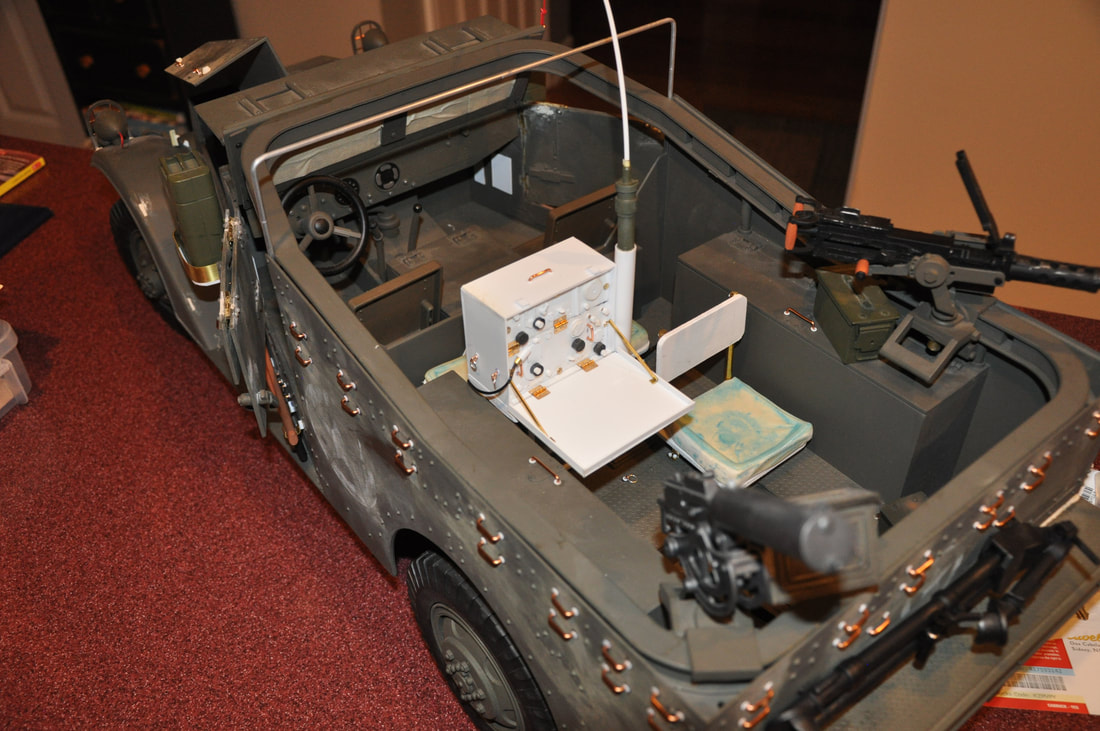
The other big addition to the vehicle was a scratchbuilt radio with generator. I started with a picture of the original, created a scale drawing and then built it out of styrene. This vehicle also had the front wheels articulated so that they could be turned left and right for photographs.
|
|
|
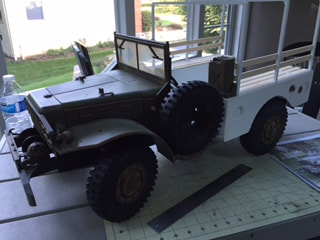
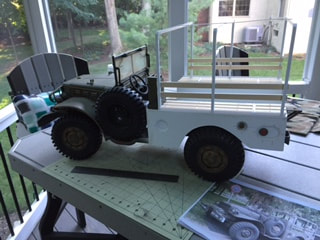
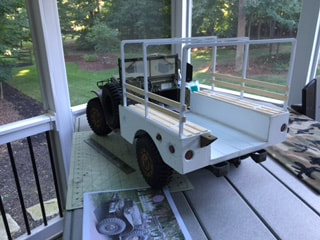
I'm sorry that I don't have better pictures of my Dodge Weapons Carrier. These were the only shots that I took during the build (probably with my phone). The vehicle was built from a 21st Century Command car. I basically took it apart and then cut the body in half behind the driver's seat. A new back end was built out of styrene. Probably the hardest part of this whole project was creating the bucket seats for driver and passenger out of the existing seats. This vehicle also got articulated front wheels.
|
|
|

|
Unfortunately I do not have any in progress shots of my Sherman. I know I took some, but I can't find them anywhere. I added a few details to it, but nothing extensive like these vehicle reworks. Hopefully seeing the vehicles like this will be helpful to someone thinking about making modifications to their own vehicles. - PM
