My frustration with Facebook has continued to grow and so I've decided that I am going to use it only to direct folks to updates on this website. This blog use to be the On30 Model Railroading section of my website. You will find the stuff I did a couple of years ago below, but it is now going to be my update section for 1:6th, Model Railroading and whatever else I decide to throw in here. Hope you find it interesting and helpful. - PM
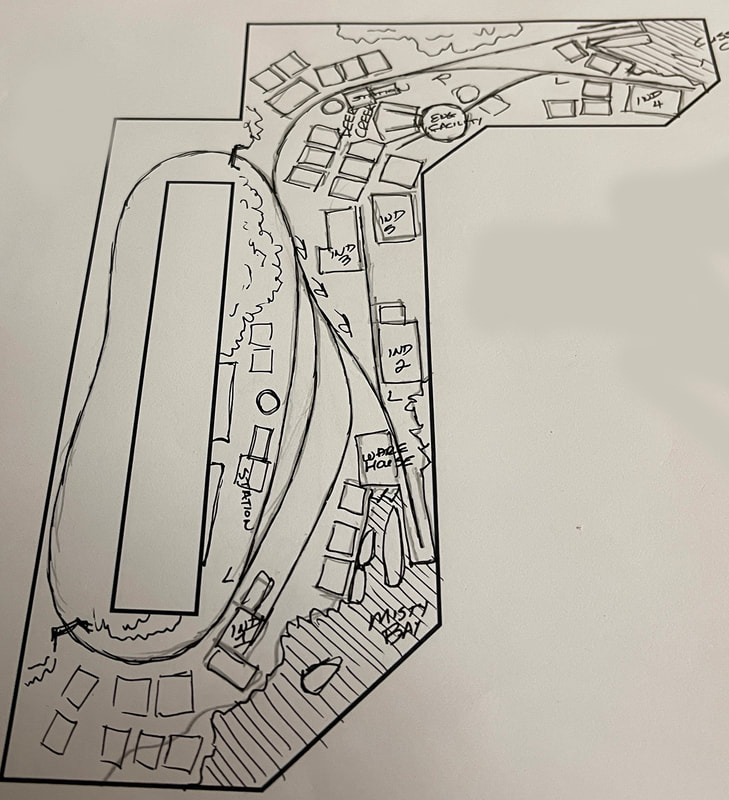
Above is the drawing that I did of the new layout. The area on the left is not to scale, that cinderblock wall is actually quite a bit wider that what I drew. The wall is actually supporting the fireplace on the main level of the house. On the other side of it are some built in shelves. The layout will have a loop that will pass through the shelves and come out on the other side, as seen in the drawing. I actually did three different layouts to fit this space and this is the one I ended up choosing. My decision was based on which version fit the best... and well, this one won. The railroad is essentially a point to point with a loop thrown in for good measure. The loop allows passenger and freight trains to come from parts unknown to interact with the point to point. Essentially the point to point is two water terminals that are connected by a local railroad. It allows folks from the top water terminal to make their way to the lower one. There are also several interconnected industries that allow for shuffling freight back and forth.
I used a made to order benchwork that can be assembled to fit your plan (I'm not very good with wood). This was then covered with 1/4" plywood and a traditional modeling surface, a fiberboard called Homasote. The areas that are cut away to expose the plywood will be water features as shown in the drawing at top. I have a number of plastic structures that I have purchased over the last few years that I played out on the benchwork and that was how I determined which plan I would choose. While the buildings were still in place I set down scale printed switches so I could get an idea of where the track would run. Once I was satisfied it was going to work, I moved the structures out of the way and began drawing the track plan on the fiberboard. Drawing in ties probably seems a little over the top to most folks, but it was important to me that I considered the track as a whole and not just where the rails would be. I am new to O Scale, having only modeled in HO previously. Things take up considerably more space in this scale and I wanted to know for sure that it was going to work before I started laying track.

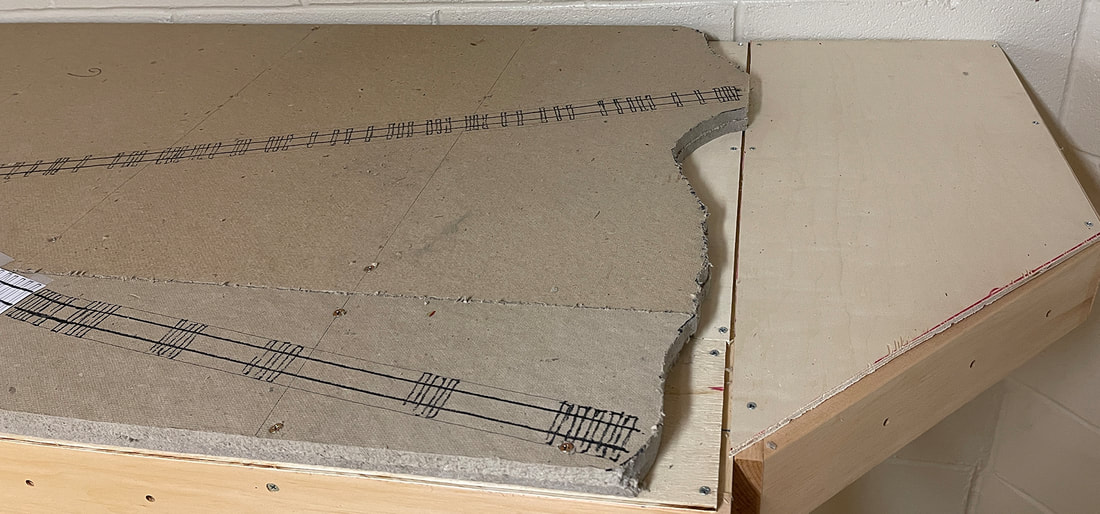
Below, on the left is where the loop will enter the shelving on the back side of the wall. A hole will need to be cut of course. On the right side the track nearest the wall is the front side of the loop. Part of it will pass though a tunnel (still kind of working that out in my mind).

This is the top end of the layout and the exposed plywood will end up being water.
Once I had the areas of fiberboard cut where I needed to cut them, I used wood screws to secure it to the benchwork. All of the screws and seems between the sections will be covered with joint compound before any scenery work is done.
Once I had the areas of fiberboard cut where I needed to cut them, I used wood screws to secure it to the benchwork. All of the screws and seems between the sections will be covered with joint compound before any scenery work is done.
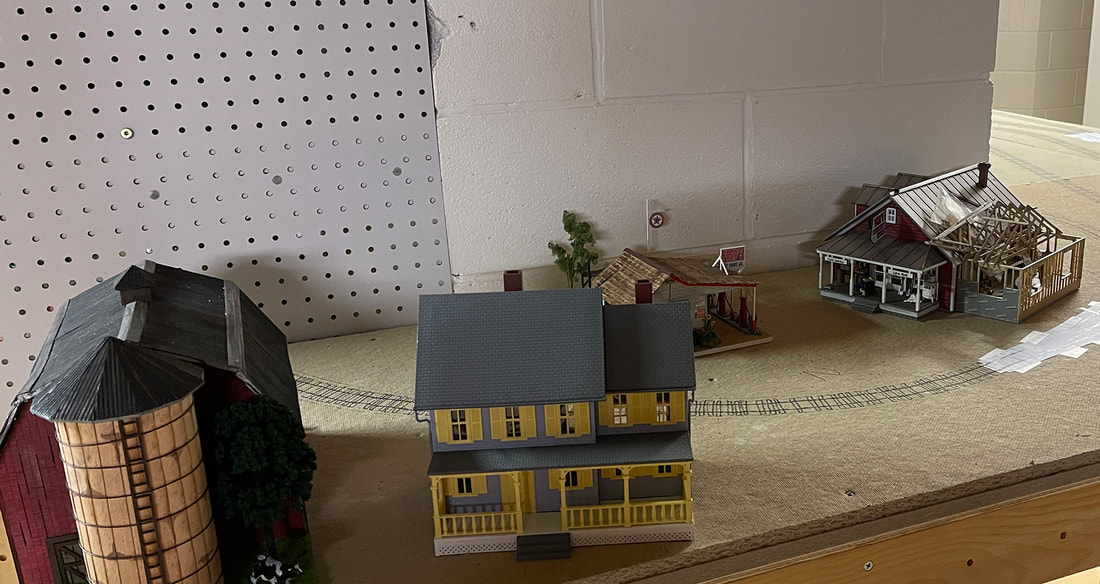
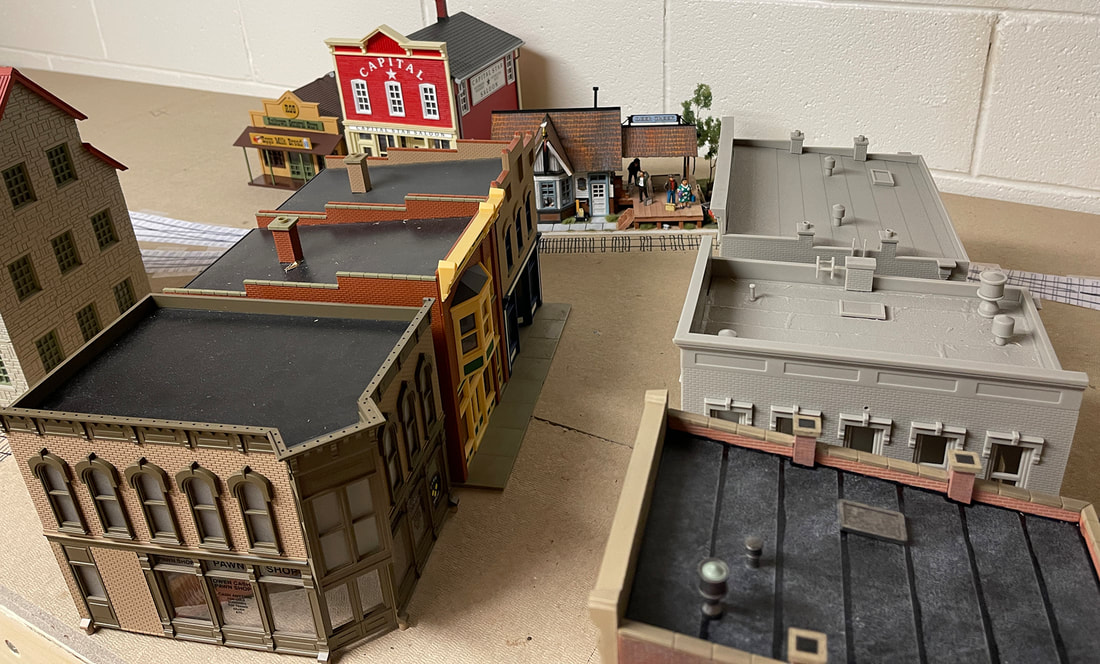
When all the track work was drawn on the fiberboard and it was secured to the benchwork, I then put the buildings back on the layout. The buildings that you see in the following pictures are only part of the structures that will eventually be part of the layout. There are several kits here and some pre-made structures that will receive modification before they are done. Most of the rest of the structures will be scratch built.
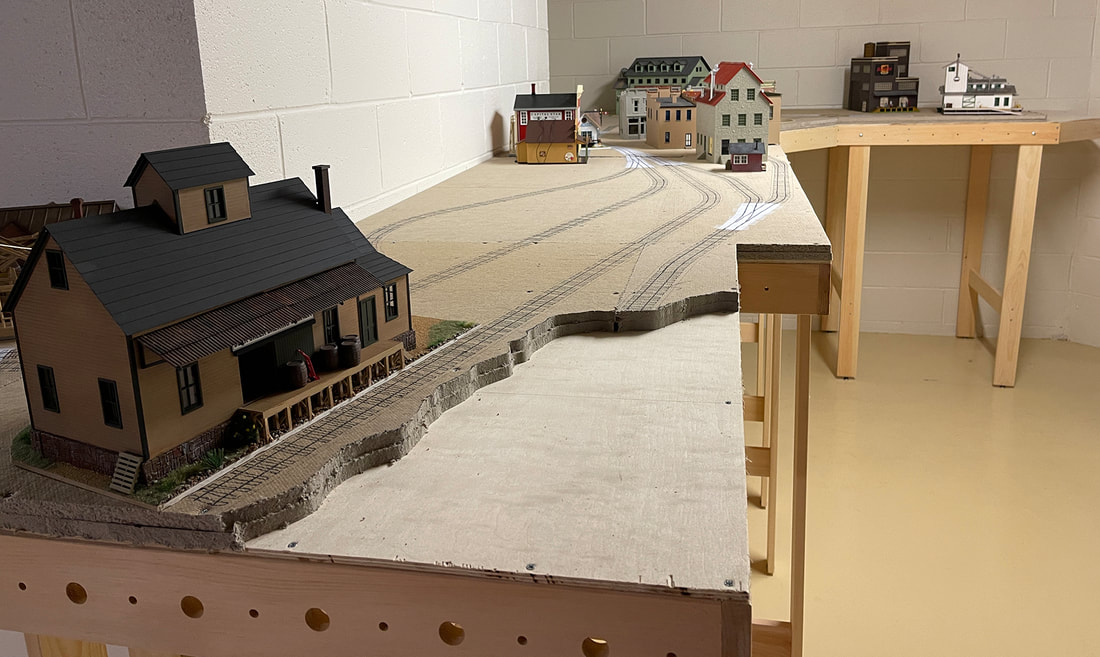
In the photo below, the barn is currently sitting on the edge of the layout. There will be a one foot extension added to the left of where it sits, giving me a little more space for the "farm".
In the photo below, the barn is currently sitting on the edge of the layout. There will be a one foot extension added to the left of where it sits, giving me a little more space for the "farm".
In the photo below, there will be a portion of a "mountain" through which the train will pass under. I would like to do the tunnel portals in such a way that it looks natural, rather than looking like it belongs under a Christmas Tree. Still working that out.
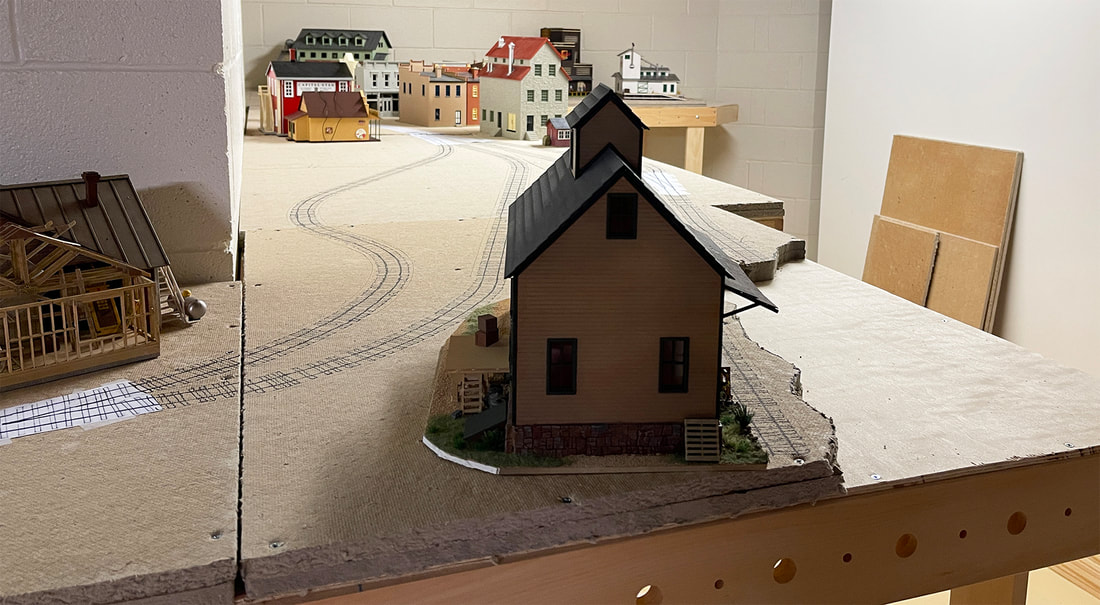
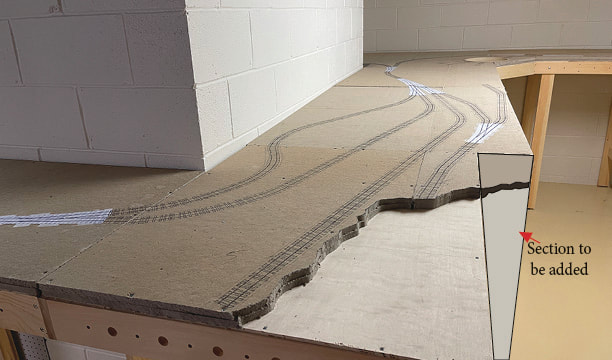
As shown in the very first photo at the top of this post, I am going to extend the benchwork on the right so that it flows a little better and adds some additional land and water scenery. There will be a wharf here with a lake steamer. There will be a small station, a bar and who knows, maybe a bait shop.
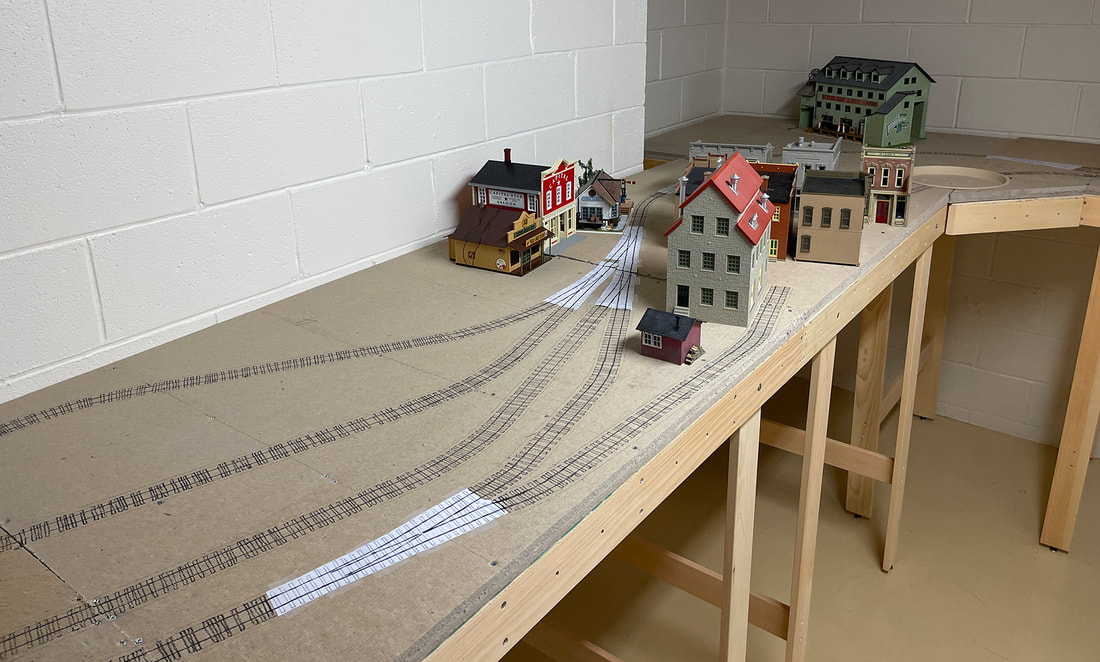
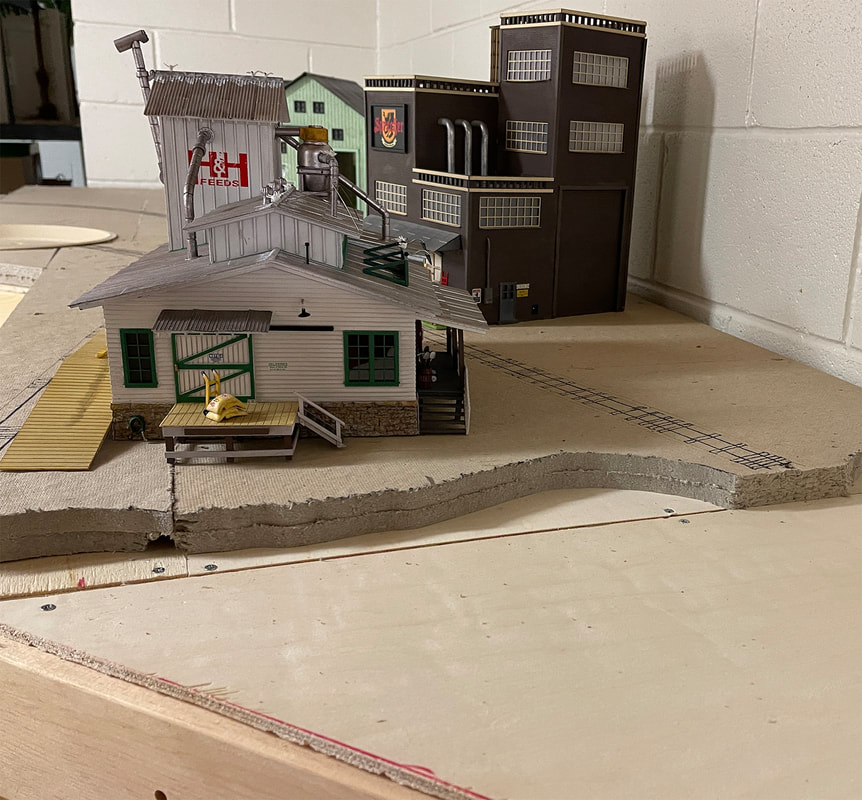
Below the future town of DEER CREEK, for which the railroad is named. The large factory in the background will have a siding eventually. I did not draw it into the plan, but I have an extra switch to make it work. Originally part of the town was going to go back in this corner. The corner is hard to reach, so other than the factory, it mostly just going to be some scenery.
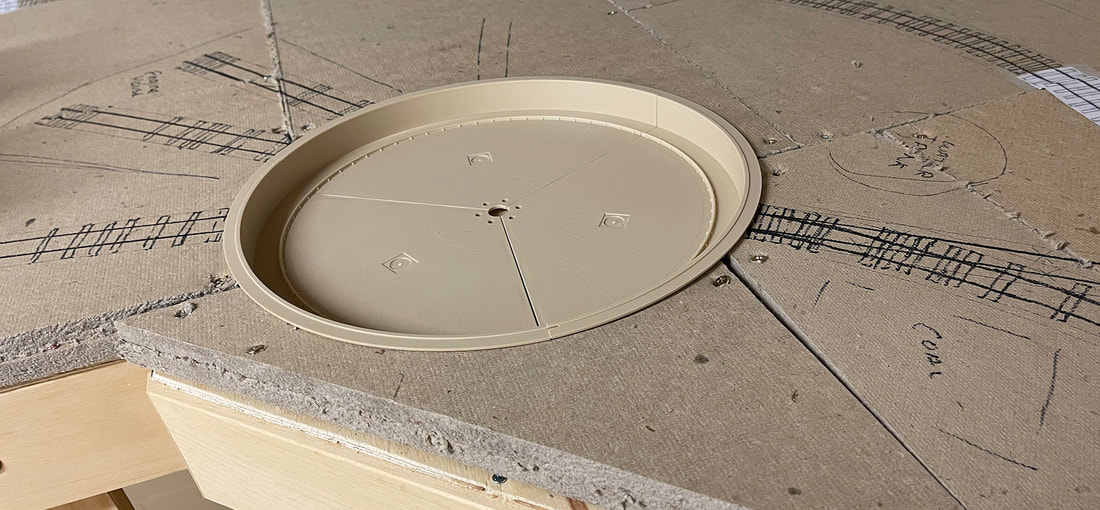
To one side of Deer Creek sits the engine facility. There will be a two stall engine house, a turntable, water tower, coal facility structure and a sand tower.
Finally, here is that upper end of the layout with the other water terminal. Besides these two industries, there will be a small station, a wharf and a small hotel. There is room on the other side of these two buildings for additional structures, but I haven't really given much thought to that yet.
And that is pretty much it for this update. As I said up top, there will be 1/6th scale, O scale and who knows what else in this blog. Essentially it is going to take the place of my Facebook postings. I will alway let you know on the Facebook page when there is something new here... I'm just tired of fighting with their platform when it comes to posting pictures - thanks for your patience, PM
And that is pretty much it for this update. As I said up top, there will be 1/6th scale, O scale and who knows what else in this blog. Essentially it is going to take the place of my Facebook postings. I will alway let you know on the Facebook page when there is something new here... I'm just tired of fighting with their platform when it comes to posting pictures - thanks for your patience, PM
 RSS Feed
